
I may no longer be a Sew it Up participant but I'm still sewing along! Here is what would have been my week 2 entry.
The challenge:
Make a shift dress. Emphasis is on finishing, fit and techniques used.
My entry:
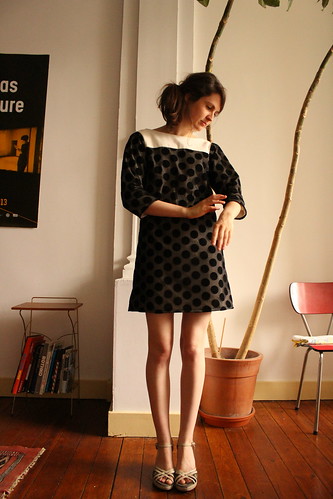
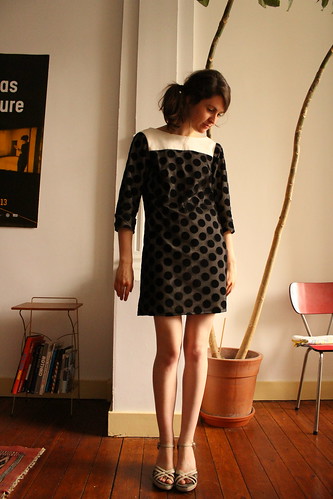
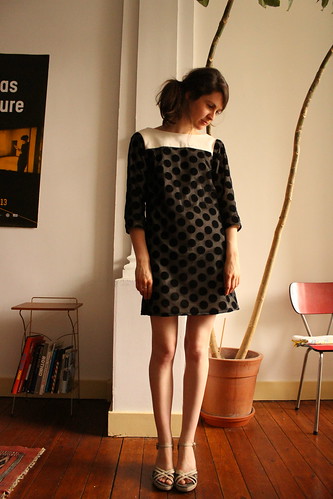
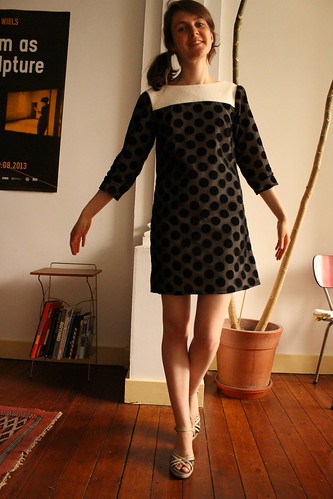

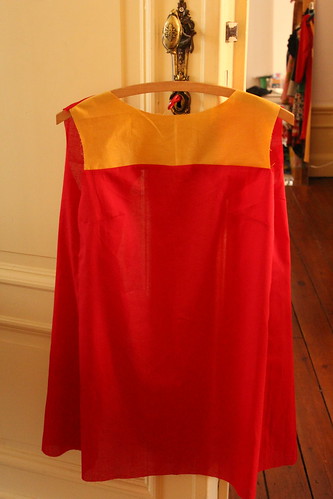
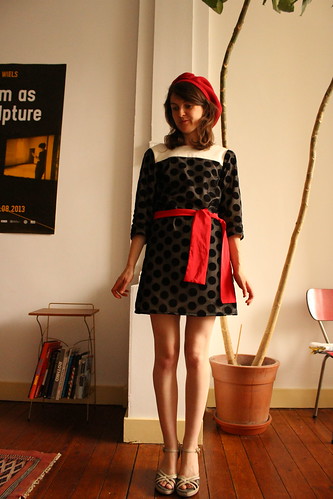
The first thing I did to prepare for this challenge was to think about what exactly a shift dress is. As I understand it, a shift dress is not supposed to be that fitted around the waist and hips, yet despite its loose nature it should not be entirely shapeless either. A shift dress should have an A-line shape and it should sit above the knee. It can be sleeveless or not. It is meant to look a bit waify. And while a whole variety of different looking dresses can be grouped together under the umbrella term 'shift dress', the look most people think of is a '60s silhouette', i.e. a style of dress our collective memory has decided defines how all young women dressed in the 60s.
So, I decided to embrace the 60s cliché head on with this challenge!
I drafted a shift dress pattern by extending Tilly and the Buttons Mathilde blouse into a shift dress (I got rid of the pleats) and I drafted some new mid-length sleeves to go with it.
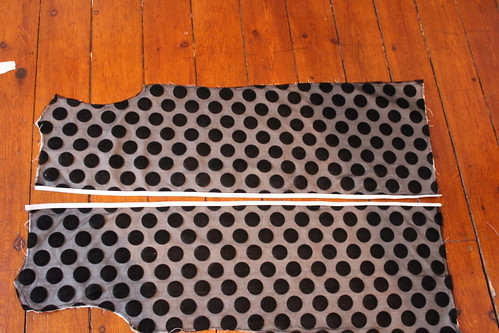
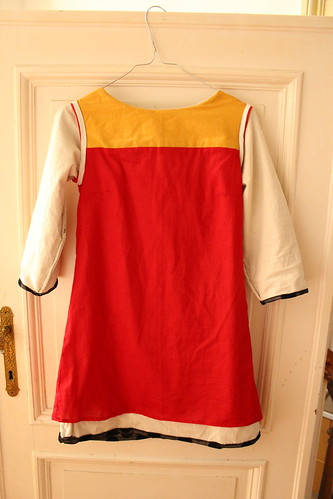
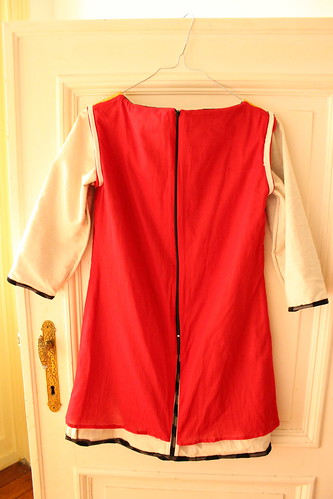
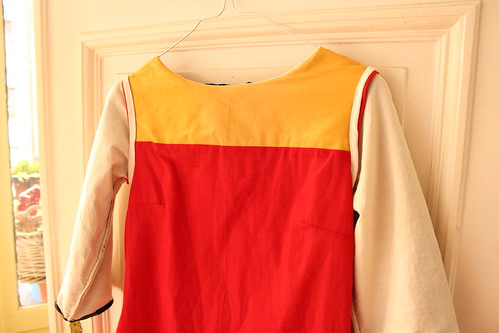
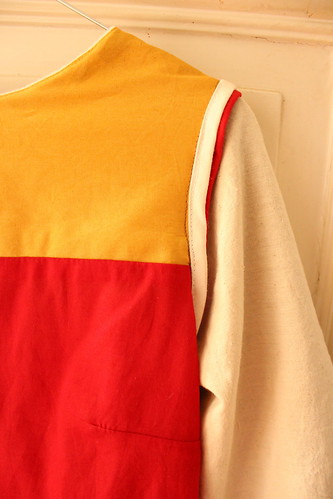
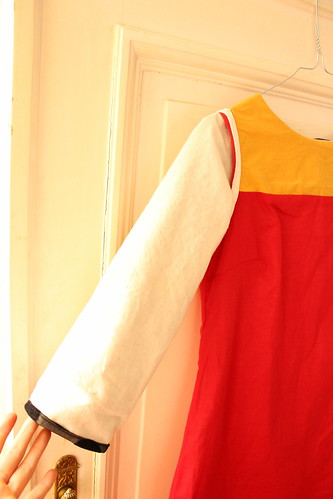
The fabric is a very fine black mesh with felt spots on it. The lining is (apparently) fine red Indian cotton. Both were ridiculously cheap bought on Goldhawk Road. The underlining for the black spotty pieces is calico. The yoke is a white soft fleecy remnant I got somewhere, and the yoke lining is yellow cotton poplin.
The emphasis was on finishing and techniques so I tried to sew as neat a job as possible.
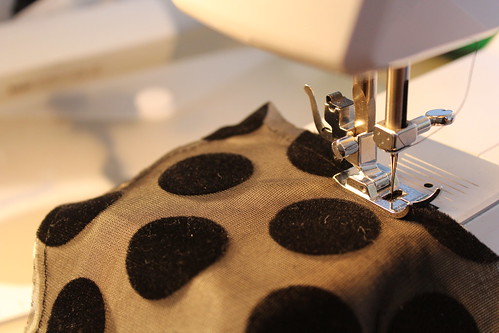
Underlining - This is the first time I've underlined anything! I did so because it would have been impossible to use the black mesh fabric otherwise! The underlining gives this very fine and loose (almost stretchy) fabric some body, making it much easier to work with. It was nice to use calico for something other than making muslins out of.
Pinning the cut-out main piece of fabric to the underlining piece.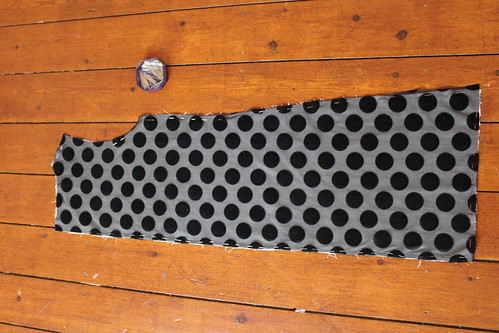
Sewing them together.
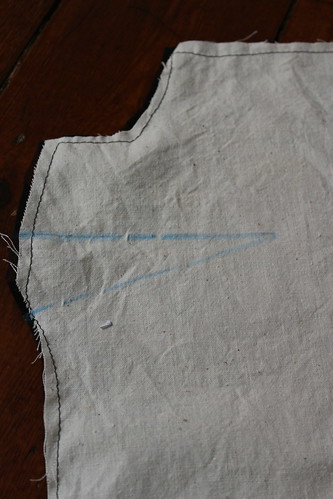
Sew any darts once your two pieces are sewn together.
Lining – I love the lining! I think it looks just as nice on the inside as it does on the outside! Would have been a good dress to wear on Fashion Revolution Day!
Lining all sewn together.
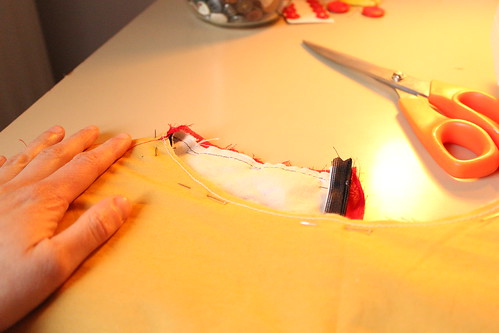
Pinning the lining to the dress at the neckline, ready to sew.
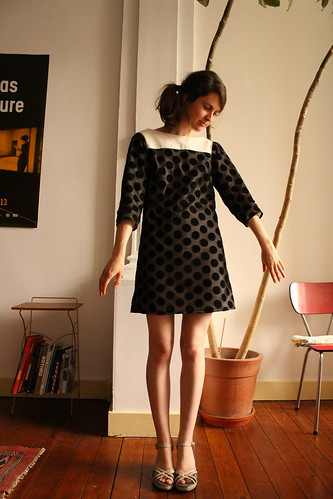
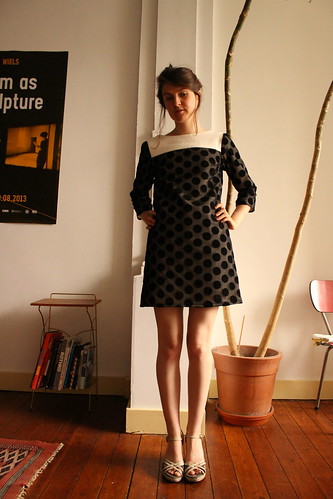
And just in case this whole escapade wasn't 60s enough, let's add some silly accessories:
The challenge:
Make a shift dress. Emphasis is on finishing, fit and techniques used.
My entry:
The first thing I did to prepare for this challenge was to think about what exactly a shift dress is. As I understand it, a shift dress is not supposed to be that fitted around the waist and hips, yet despite its loose nature it should not be entirely shapeless either. A shift dress should have an A-line shape and it should sit above the knee. It can be sleeveless or not. It is meant to look a bit waify. And while a whole variety of different looking dresses can be grouped together under the umbrella term 'shift dress', the look most people think of is a '60s silhouette', i.e. a style of dress our collective memory has decided defines how all young women dressed in the 60s.
So, I decided to embrace the 60s cliché head on with this challenge!
I drafted a shift dress pattern by extending Tilly and the Buttons Mathilde blouse into a shift dress (I got rid of the pleats) and I drafted some new mid-length sleeves to go with it.
The fabric is a very fine black mesh with felt spots on it. The lining is (apparently) fine red Indian cotton. Both were ridiculously cheap bought on Goldhawk Road. The underlining for the black spotty pieces is calico. The yoke is a white soft fleecy remnant I got somewhere, and the yoke lining is yellow cotton poplin.
The emphasis was on finishing and techniques so I tried to sew as neat a job as possible.
Underlining - This is the first time I've underlined anything! I did so because it would have been impossible to use the black mesh fabric otherwise! The underlining gives this very fine and loose (almost stretchy) fabric some body, making it much easier to work with. It was nice to use calico for something other than making muslins out of.
Pinning the cut-out main piece of fabric to the underlining piece.
Sewing them together.
Sew any darts once your two pieces are sewn together.
Lining – I love the lining! I think it looks just as nice on the inside as it does on the outside! Would have been a good dress to wear on Fashion Revolution Day!
Lining all sewn together.
Pinning the lining to the dress at the neckline, ready to sew.
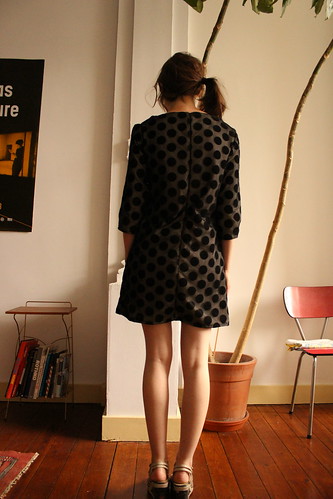
I added bias
binding to tidy up the messy edges before adding the sleeves. I did the same at the centre back seams.
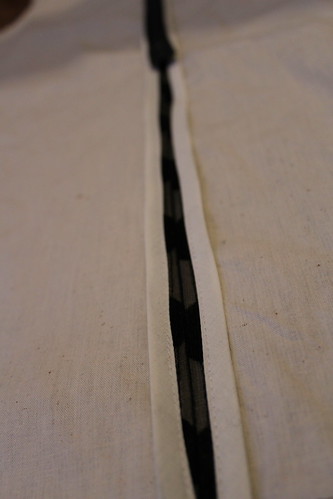
I also understitched the lining to the seam allowance at the neckline to give it a clean finish.
Here are some photos of the inside of the finished garment.

I also understitched the lining to the seam allowance at the neckline to give it a clean finish.
Here are some photos of the inside of the finished garment.
And just in case this whole escapade wasn't 60s enough, let's add some silly accessories:
Check out what the remaining Sew it Up participants have made and vote for your favourite!

This is so cute!! Love it with the beret and those shoes - perfection! :)
ReplyDeleteThanks! Yeah I love the shoes too
DeleteThis is super cute - I love the surprise of the brightly coloured lining.
ReplyDeleteCheers! Yeah, I almost like the inside more than the outside!
DeleteLOVE IT!
ReplyDeleteYour dress looks great! I would have voted for you :) I too love the Mathilde pattern and would be curious to hear more about how you transformed it into a dress - did you just extend the side seams or was it more elaborate?
ReplyDeleteHello! Thanks! I essentially just extended the side seams and reshaped them into a more A-line shape. I might write a short tutorial about it. It is very simple. I might try and elaborate on it and make it a bit more fitted next time by putting darts in the back pieces, we'll see!
DeleteThe dress is really pretty! The coloured lining is a great surprise :)
ReplyDeleteThanks, Lieke!
DeleteVery cute! It looks super good on you and very clean on the inside!
ReplyDeleteThat's really lovely!
ReplyDelete