7.4.14

An unintentional GBSB fangirl shirt

IMG_0997

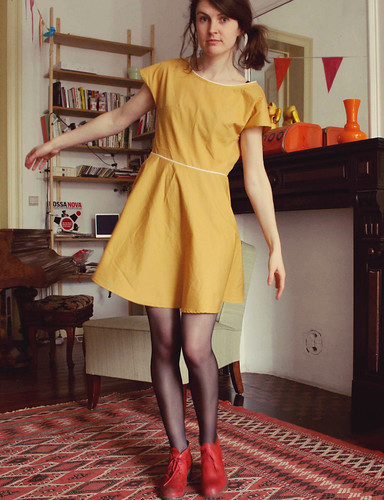
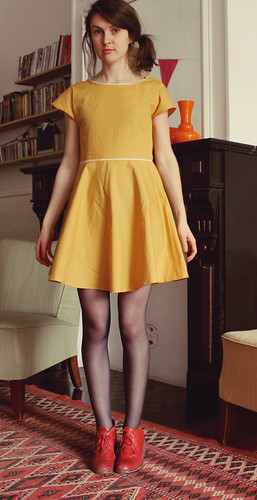
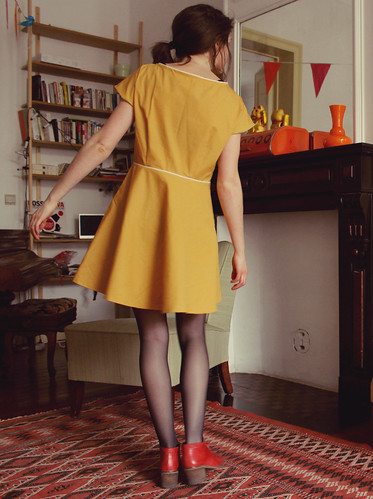
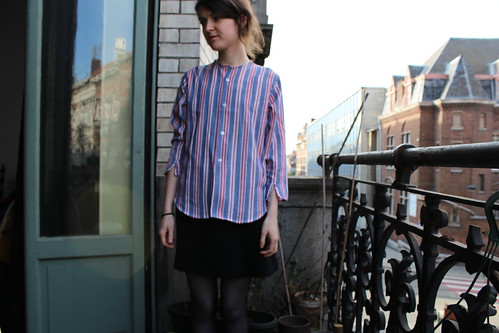
Not in anyway my intention at the outset when I started mulling over ideas about what to do with an oversized old men's shirt this week, but I ended up working on a sewing project that turned into what I'm dubbing my 'GBSB fangirl extravaganza'. Why so I hear you ask? Well, firstly, because the three main construction/drafting techniques I used have all been featured on this series of the programme, and secondly, because the fabric bears a striking resemblance to the dress featured in the opening credits!

IMG_1017

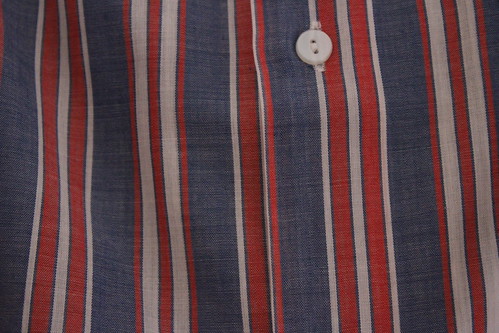
This shirt was given to me by a friend ages ago and because it was way too big it was lurking in my 'donate or recycle' pile. I really liked the print so I was reluctant to part with it and I knew I wanted to refashion it into a better fitting shirt. The main reason I'm becoming a big fan of recycling shirts that are too big into ones that fit is to avoid sewing buttonholes as I really have trouble working the buttonhole function on my machine – this way I can recycle the buttonholes and buttons by positioning the front bodice pieces accordingly.

before

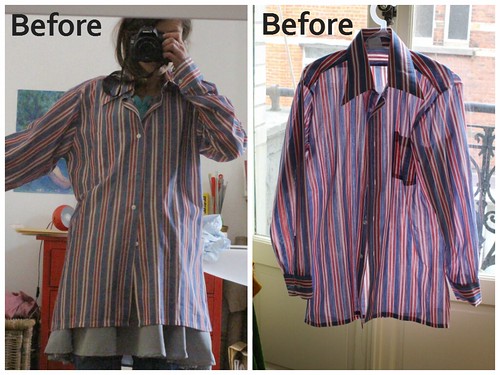
Rather than make another Violet shirt from it, I wanted to challenge myself to try something I'd not done before so I decided to try tracing a pattern off from a shirt I like the fit of, as the GBSB contestants were required to do in this week's semi-final. This project also required me to draft a sleeve from scratch which I'd never done before, also a technique the sewers were tested on this week. And the final GBSB parallel was my first ever attempt at flat felled seams, which we saw the contestants tackle in episode 4.

Not that my efforts are in any way near the same league as Chinelo's amazing pleats on her sleeve adaption or her organza party dress, Tamara's yoga outfit, or the beautiful flat-felled seams on show in the child's dungaree challenge (my favourite pair were Jenni's!), but it did make me happy all the same to 'take part' like this. The programme is really well produced as the challenges and techniques are things that reflect the challenges home sewers do actually set themselves and it inspires viewers to give things a go that they might not have come across otherwise – I'd never heard of flat felled seams before, for example. But I won't look back now – I think that the flat felled seam, like its cousin the French seam, is so useful, particularly for those of use without an overlocker.

>>>> Replicating a garment: some tips

 - I had a good look at the shirt I wanted to replicate and I noted down what pattern pieces I needed. (I omitted the collar.)

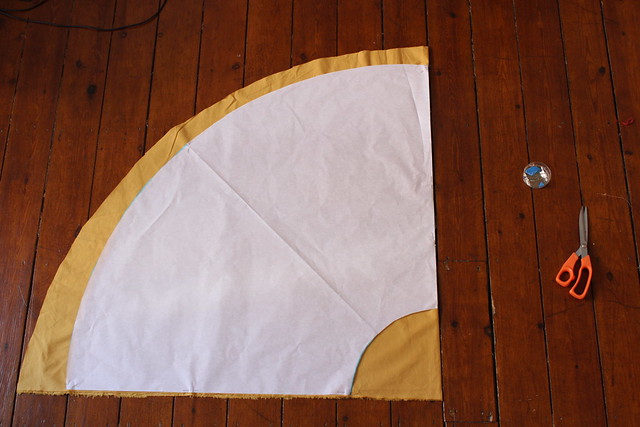
- Using tracing paper and a rotary wheel I traced off each piece by laying it flat and doing my best to accurately trace from the exiting garment through to the tracing paper. You can run the rotary cutter along the seams being careful not to mark the fabric.

- Remember to add on your seam allowances to the pattern piece.

- For accuracy, measure carefully your seams on the garment with a tape measure and make sure your pattern pieces correspond both to the garment and to each other where they need to join up.

- Depending on the garment there are a few ways to do the tracing - as we saw on GBSB – but the key is to take your time and measure the pieces.

- Obviously the trickiest part of imitating a shirt is the sleeve as you can't really lay it flat without cutting up the existing garment – and given that the idea is to replicate a favourite garment you're probably going to be reluctant to do that!

- The important thing is that your new sleeve fits accurately your new front and back pattern pieces.

- I'm going to explain how I drafted a set-in sleeve pattern for existing front and back bodice pattern pieces in a future post. I think that as well as for imitating sleeves that can't be laid out flat, this method can also be useful for when you want to draft a sleeve for a sleeveless pattern, or if the sleeve for your pattern is gathered, for example, and you'd like it to be set-in.

IMG_0998
And so ends my mini-GBSB sew-along-at-home fangirl extravaganza.

Here is a nice behind the scenes article about GBSB.


Good luck to Chinelo, Heather, and Tamara in the final!

3.4.14

Mustard and maths

After I made my hybrid dress – drafted by adding a half circle skirt to the Colette patterns Truffle dress bodice with modified Anna-style mini raglan sleeves – I knew I wanted to tweak the method and make another one.
And here is my second one, this time in mustard yellow cotton poplin with white piping at the waist and neckline. I'm really pleased with it! Here are some pictures of me oddly dancing in the living room!

img_0840_edit img_0851edit

img_0843_edit img_0856edit
This time I took in some of the excess at the back by slashing and spreading at two points on the back neckline, and I took more care to draft the circle skirt so that it matched up exactly to the bodice. I also shortened the skirt - last time I accidentally cut far too much fabric, and the resulting dress was longer than I had intended.

And, *sewing geek alert*, I've set out below the different stages behind drafting a circle skirt to attach to an existing bodice pattern.


>> First of all: How to work out your finished pattern waist measurement

 
When you want to draft a circle skirt to attach to a bodice you don't use your actual waist measurement you use the waist measurement of your finished bodice pattern pieces, so that your bodice and skirt pieces correspond and match up nicely.

The following sums will help you work out your finished pattern waist measurement:

1) On back and front pattern pieces (don't include any darts) measure the waistline measurements.
2) Then substract the seam allowance (SA) from both these numbers.
3) Multiply the figures by 2 to get the full front and back bodice waist measurements.

See my working here using my own pattern piece measurements:
img_0737new
img_0757new

4) Then add these figures together to get your finished pattern waist measurement. This is the measurement you will use to draft your circle skirt.
img_0754new


>> The circle skirt calculation


First of all I followed the By Hand London method for drafting a circle skirt, and instead of just using the app, this time I also did the full calculation before checking that the result matched the app result (it did). Not because I didn't trust the app, on the contrary, how could you
not trust something formed in the minds of the BHL ladies? No, I just wanted to make sure I fully understood where the answer comes from.

So here is my working:

img_0746new
(result rounded to nearest 0.5 of a centimetre)

HOWEVER, when I cut out my skirt pieces the skirt waist circumference was not long enough to match up with the bodice. DISASTER! It took me a while to work out why (and I'm still not 100% sure I fully understand) but I think the part of the calculation highlighted in pink (in the diagram above) is the little culprit.

Let's go back a bit to try and understand: why do we subtract the seam allowance (SA) from the radius (the part in pink)?  By subtracting the SA from the radius what you are actually doing is
adding the seam allowance, even though you are 'subtracting'. By subtracting from the radius value you 'pull up' the waist line adding your seam allowance at the waist.

If you have a look at this diagram (below) it should make sense.

IMG_0751

Imagine the radius line getting smaller (subtracting from the radius value), this would add a seam allowance at the waistline.
Now imagine the radius line getting bigger (by adding to the radius value) and you would actually be eating into the skirt, and the skirt waist circumference would be wider - the complete opposite of what you want to do.

This is all well and good for a circle skirt on its own, but when it comes to drafting a circle skirt to attach to a bodice, by adding a seam allowance at the waist (by subtracting from the radius) we effectively 'pulled in' the waist circumference making the skirt piece too small to match up to the bodice.

I rectified this by cutting off the 1.5cm extra, and then it fit nicely to my bodice, this is obviously an easy way to fix it but I'm happy I worked out why the pieces were not joining up so next time I won't have to go through the same process!

So, to sum up: when you are drafting a circle skirt to attach to a bodice you should not add any waist seam allowance as you would do for a circle skirt on its own.


So, I should have used 21cm as my radius value and not 19.5.

If anyone has any experiences to share on this - or any contradictory experiences, I'm still not convinced I've 100% cracked this - don't hesitate to get in touch! I'd be very interested to hear about others' experiences. All in all, I'm really glad I did the sums myself otherwise I wouldn't have been able to work out where the problem was.


>> Now we just need to draft the skirt pattern piece

Once you have your radius value and you know what length you want to make the skirt you can draft your skirt piece.

1) First you need to work out the length of fabric you will need. If I want my skirt to be 61cm long, and I want 2.5cm of hem, and my radius is 19.5, I add all these figures together and I get 83. I checked it out in the app to confirm and sure enough for a 65cm waist midi length skirt the resulting fabric length was 83cm.

NOTE: I obviously should have used 21cm as my radius value, and not 19.5. (see above). Which I will do next time :)

2)
Then you draw two long lines at right angles to each other.
 
3) On both lines, measure from the right angle point and mark, firstly, the radius point (your radius value from the right angle) and, secondly, your fabric length value.

4) Draw a 45 degree line out from the right angle point and fold your pattern paper along it.
Then you can draft the circle lines (I used a pencil and a shoe lace) on just half of the piece. When you cut through the lines it will be identical on the folded side, giving you a symmetrical cut. I think this is a neat way to do it if you are using the pencil and shoelace method, as it can be a bit fiddly!

IMG_0728
 

5) Then you can unfold the pattern piece and lay it out on your ironed fabric with one straight edge along the fold.
 IMG_0730

5) Pin and cut out. Voila, you have your skirt piece!

>> Finally, you can get things moving along!


1. Cut out your bodice pieces.
2. Sew bodice darts, sew shoulder seams (French seams), then sew the raglan sleeve seams by folding them over and pressing twice as you would a hem.
3. Sew one bodice side seam (French seams).
4. Sew bodice to skirt (French seams). At this stage you can also add piping if you like. Just sandwich it into your French seam. As Claudia would say, why wouldn't you?
5. Sew in invisible zip at side seam.
6. Finish side seam.
7. Hem skirt. This BHL post was very useful.
8. Apply bias binding to neckline. Follow this Grainline studio tutorial intently.

ET, ENFIN, C'EST FINI !

img_0852edit
img_0845edit
img_0849edit

All that's left to say is that I really like this type of '70s yellow', and it reminds me of the lovely hues of the fittings in many of the old Belgian SNCB trains.

And finally...if you have not done so already make sure you support the aforementioned BHL ladies' Kickstarter campaign. Watch their lovely video to find out about their exciting new project.