
Today I’ve got a very special project to share: I made my dear friend Anna’s wedding skirt! Anna is one of my closest and oldest friends so this was a very special – if daunting – project! And it is definitely one of my favourite sewing projects. The top Anna is wearing comes from Catherine Deane in London and I think it goes really well with the skirt. (Want to make it clear in the first paragraph of this post that I didn’t make Anna’s ‘top half’ so I’m not accidentally taking credit for others’ work!)

Photo credit: Ruaridh Cameron

Photo credit: Ruaridh Cameron
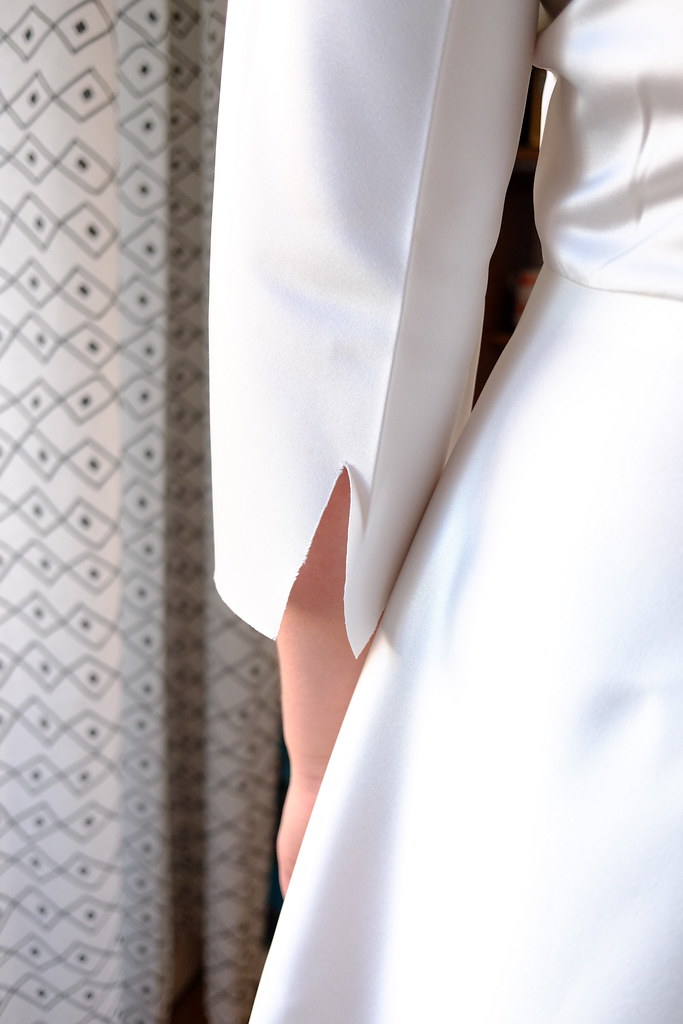
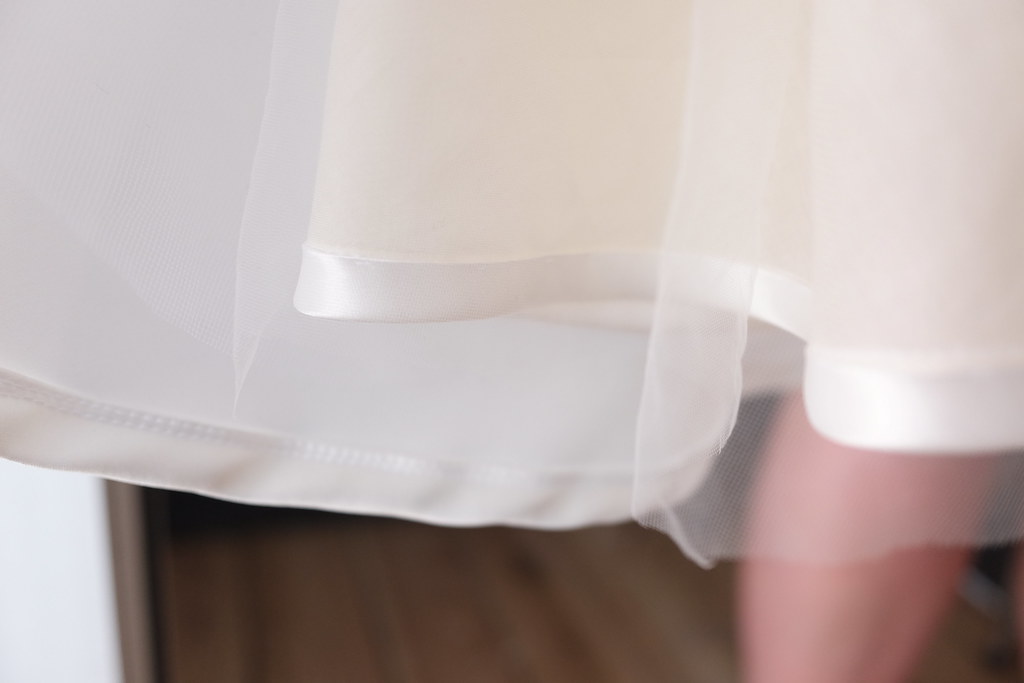
First up: let’s start at the end and look at the anatomy of the finished skirt:
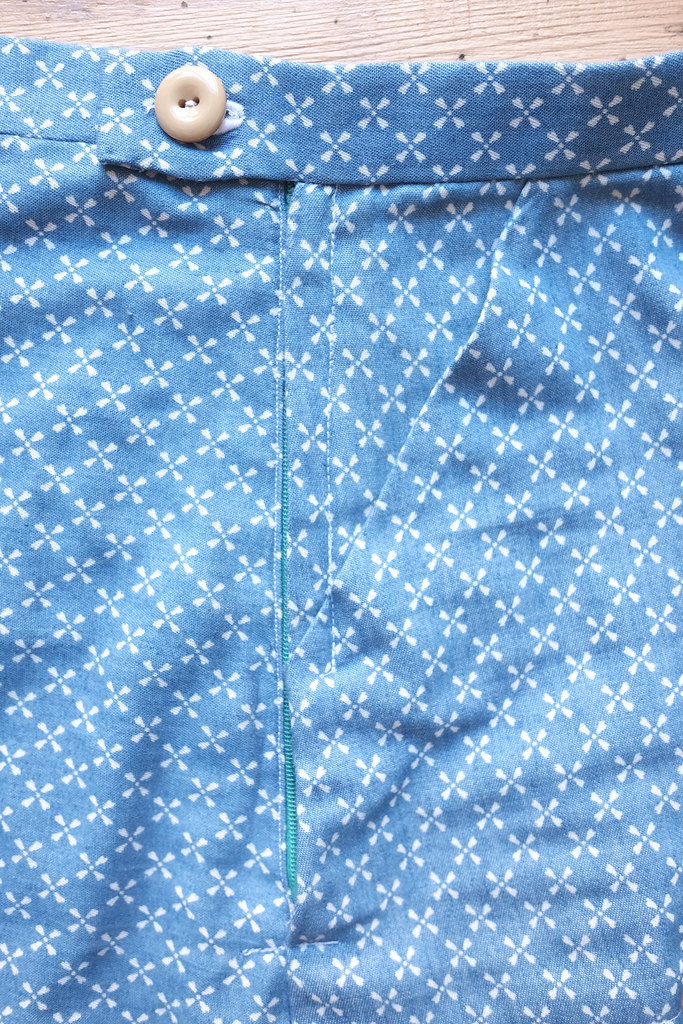
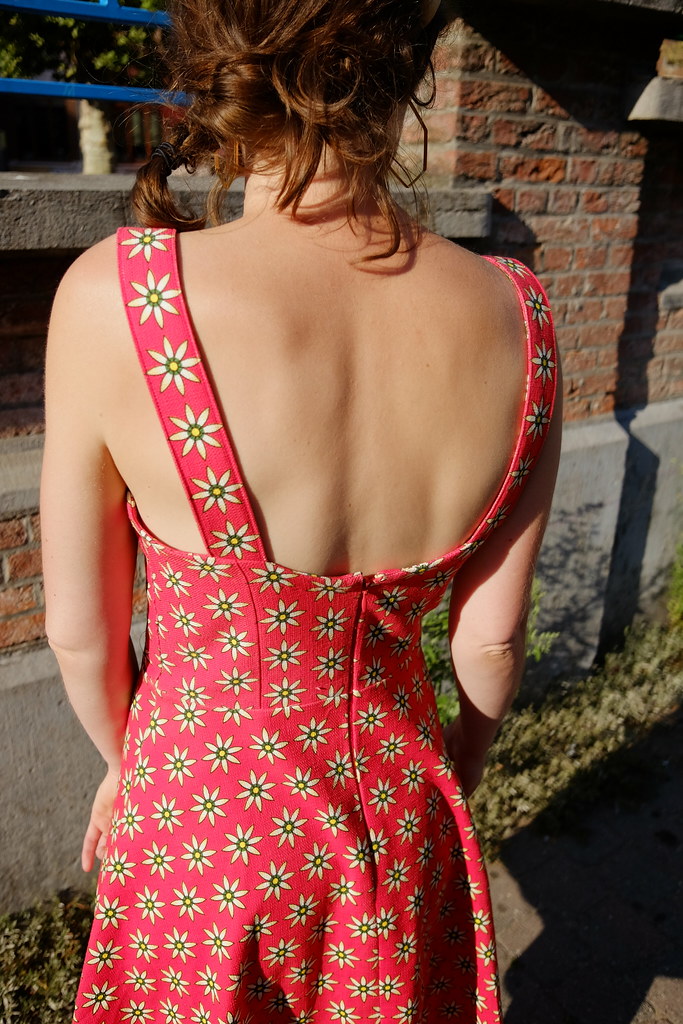
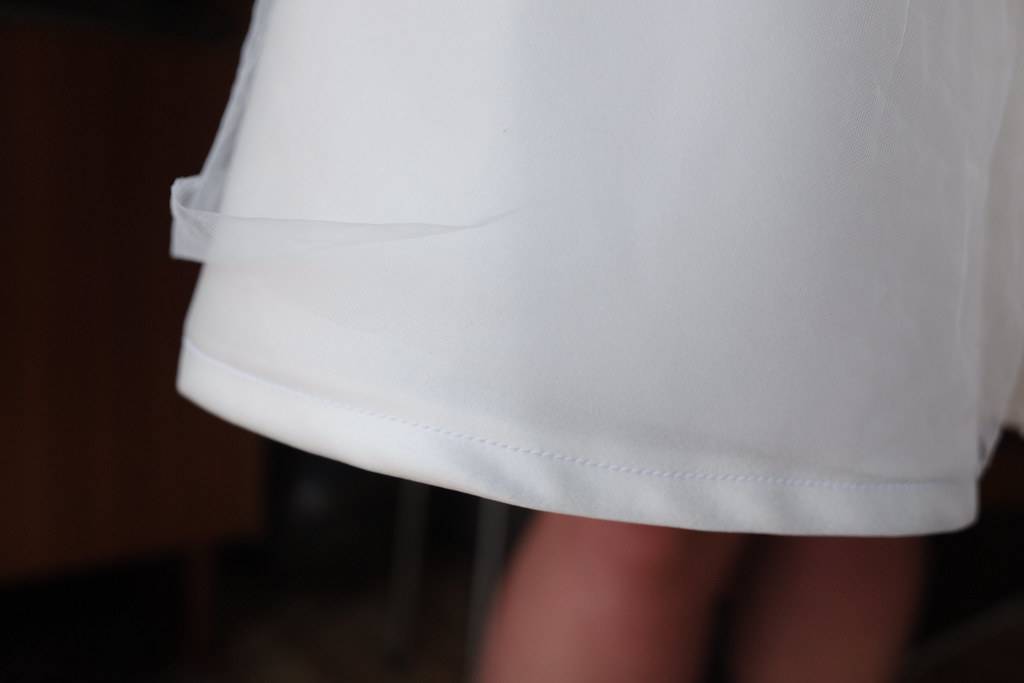
The skirt is a half circle skirt with the main fabric a duchess satin from Mandors in Glasgow. There is one layer of tulle above the main fabric, two layers under for volume, and then a cotton lining. There is an invisible zip in the centre back seam and the waistband fastening is a hook and eye. On the back there is a ‘false button’ – it’s actually a badge that Anna had made in her new fella’s tartan (Cameron).

Hand sewn zip to keep all those layers in place
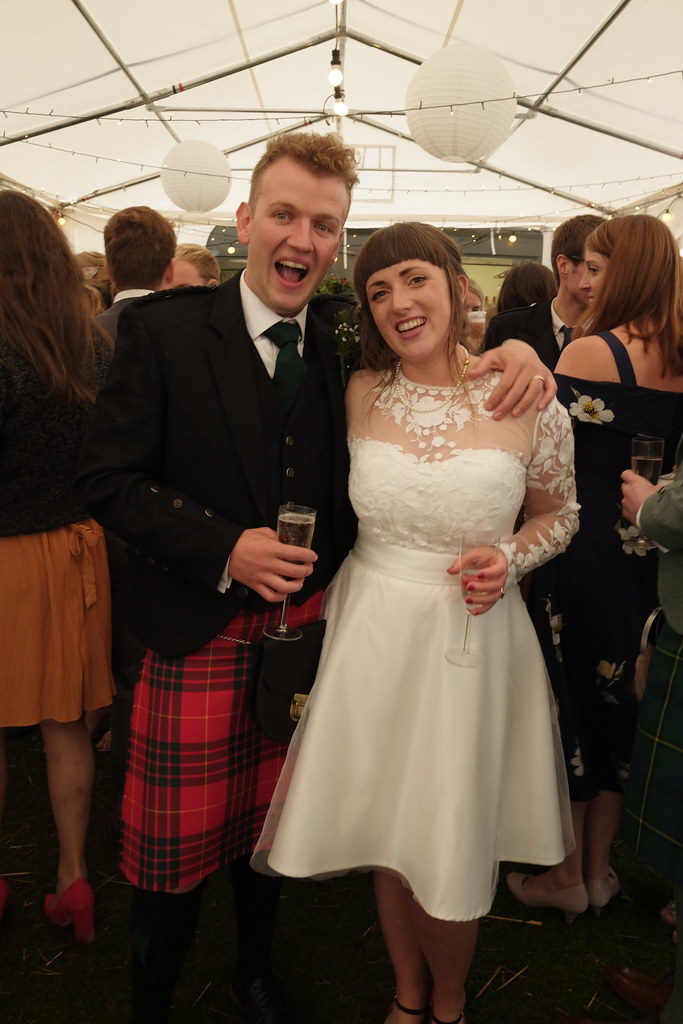
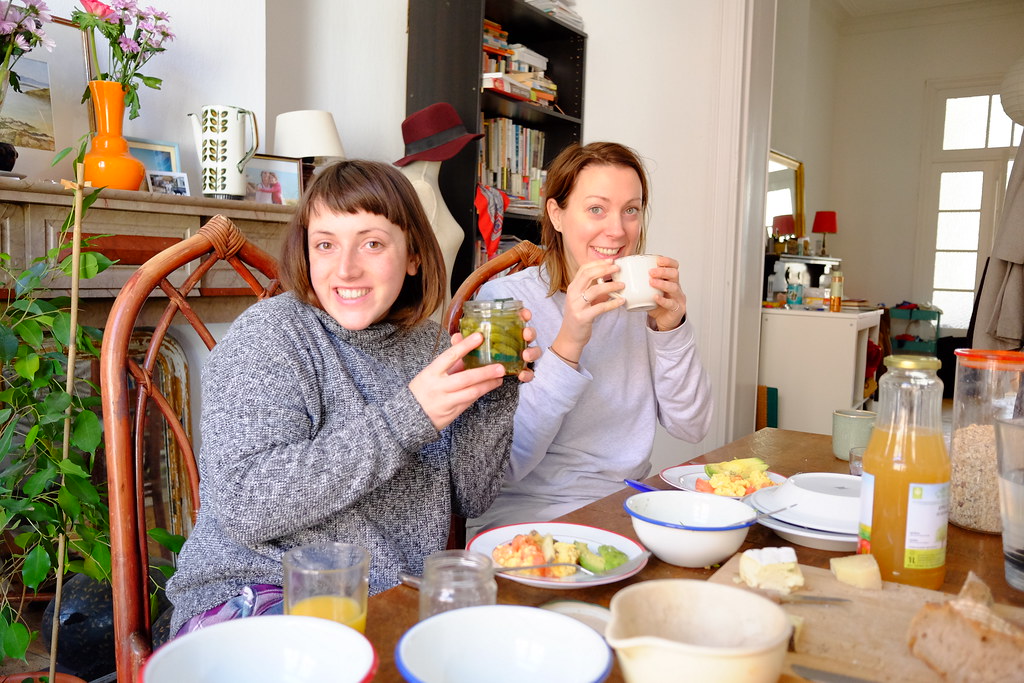
Anna with the finished skirt!

Photo credit: Christian
The process!
1) The first thing I did was take all of Anna’s measurements when we were both at home last Christmas and then I drafted a basic front and back bodice block. I sewed up a quick bodice muslin and made the necessary adjustments to the blocks. (Initially the plan was to make a whole dress but we took the wise decision given I am in Brussels and Anna in Glasgow that I would just make the skirt and Anna would find a top to go with it.) Even though we didn’t end up doing a whole dress, making the bodice blocks was still a really important part of the process. First of all because it was as good as any as a place to start! Secondly, I love drafting and relished the opportunity to try fitting on someone else’s body. And thirdly, I think it was a good way for Anna to start thinking about what kind of outfit she wanted, and how she wanted it to fit.
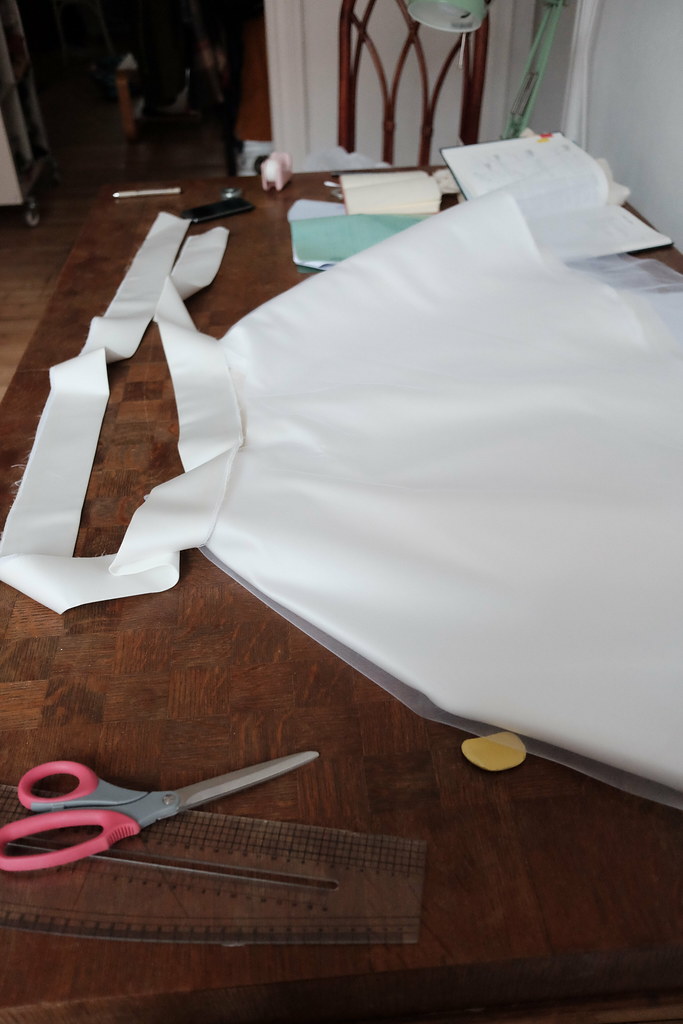
2) Next, I made a first ‘draft’ of the dress in muslin fabric once I was back in Brussels.
3) Then in February Anna and our friend Sally came over to Brussels for the weekend and brought the fabric she had chosen. Anna tried on the dress toile and I made some fitting adjustments to the blocks. I then made a full dress bodice and skirt mock-up in the main fabric, with sleeves too. I decided to cut into the ‘real fabric’ early on as it was a good way of seeing how it worked. I’d never worked with duchess satin before so wanted to get a feel for it.
That was when we decided that the bodice didn’t really look right in the fabric and to just focus on making a skirt. We realised it was going to take too long to get the bodice looking and fitting right and we only had so many weekends together to do it – think it was a wise decision! We played around with different levels of fullness – at first I made a full circle skirt but it was too puffy, the half circle skirt had a better balance of drape and poofy-outness (the technical term).


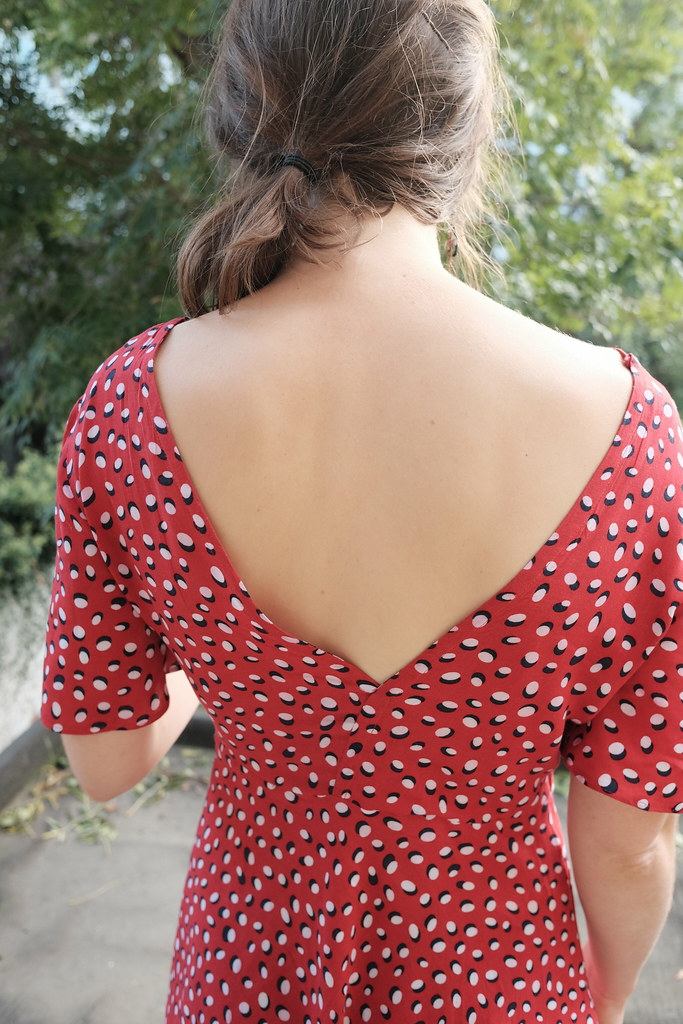
The sleeve testing!

3) After the weekend I added a lining and a waistband with a tie and some tulle layers. I then brought this over to Scotland when I was home for a visit so that Anna could take it with her to look for tops to go with it.

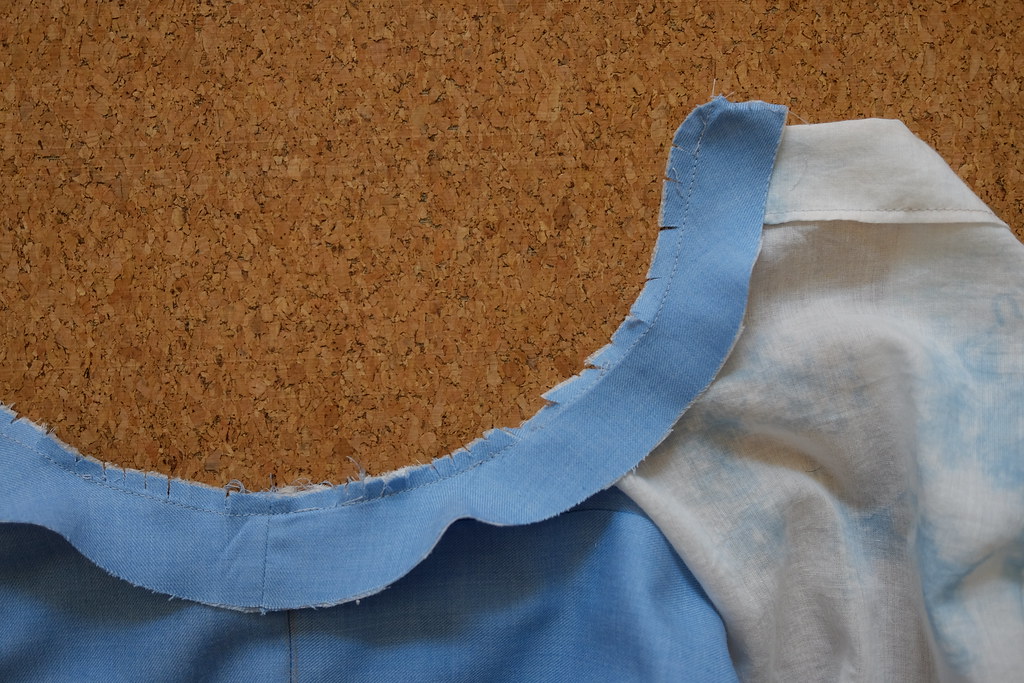
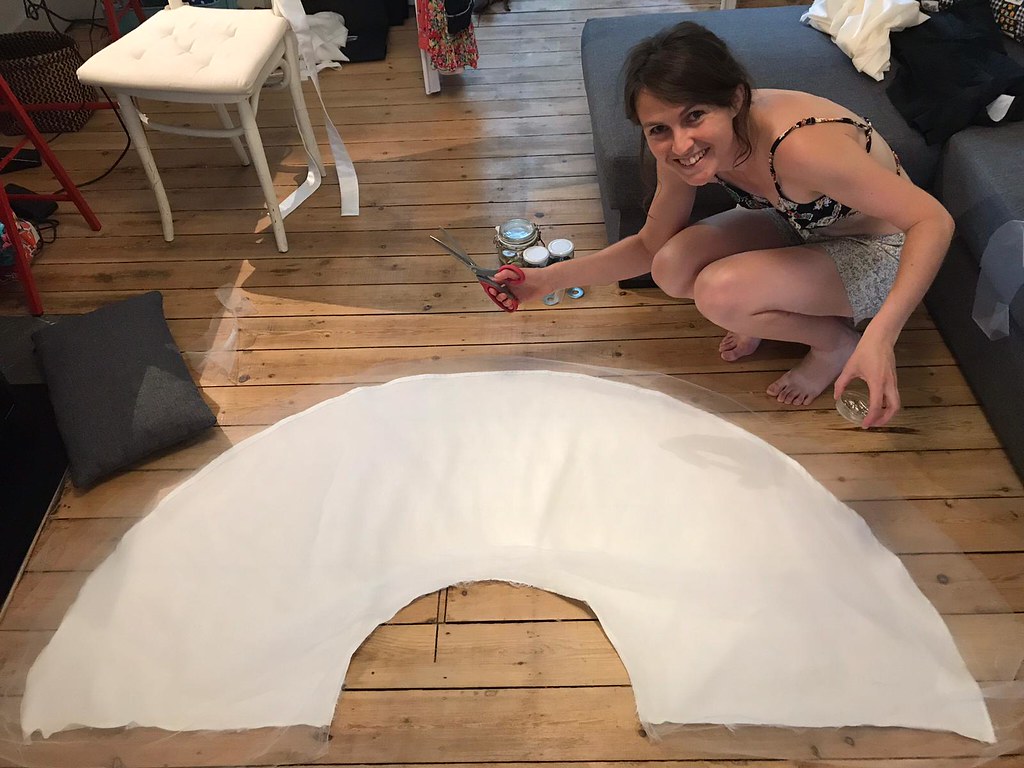
4) Then the finale was this summer when Anna brought the skirt back over so I could finish it properly and make some changes before the wedding in September. I redid the zip and took off the waistband and tie and made a simple waistband without the tie (the tie waistband really wasn’t working). I also redid most of the seams to finish everything more neatly so the insides are pretty too. I think my favourite parts of the dress are the satin binding around the lining hem and the Hong Kong finish on the centre back seam! It was pretty much 35 degrees that whole weekend so I was – no exaggeration – sewing half naked trying to battle with the tulle so it wouldn’t stick to my sweaty legs haha! It was really enjoyable in an ‘extreme sewing’ kind of way.


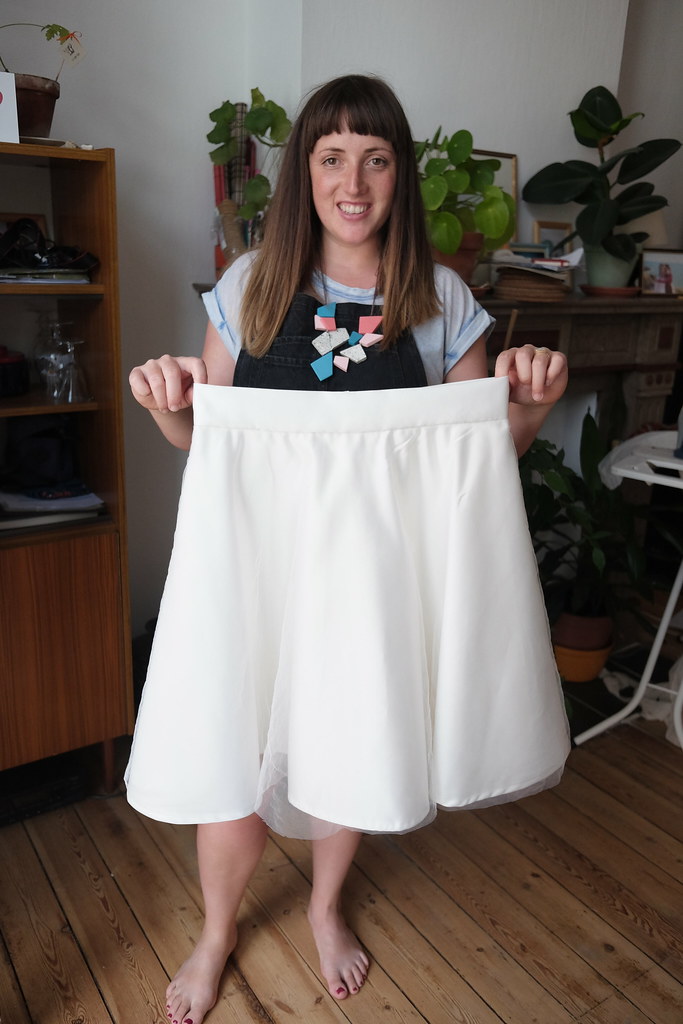
And it's finished!
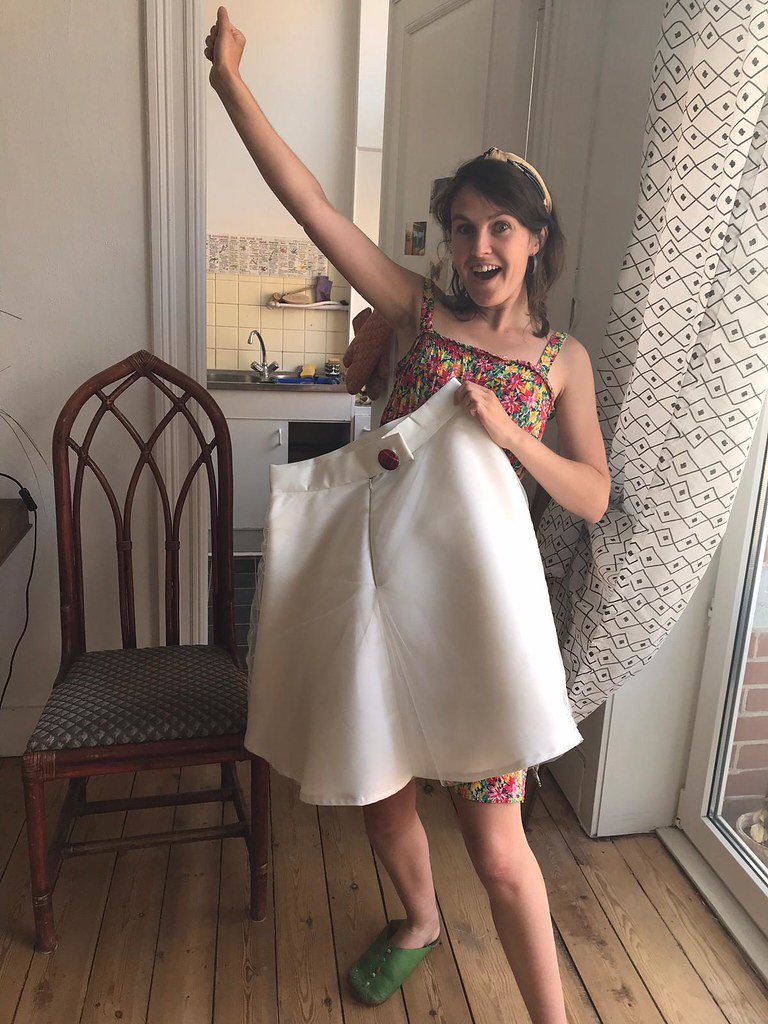
I’m 100% high on adrenalin at this point!

Anna packing up the skirt for the journey back to bonnie Scotland!
What I learnt: 8 tips for anyone thinking of wedding (or any special occassion) sewing for a friend.
1) Go for it! Of course sewing something for a special occasion like a wedding is a more involved project but if you’ve got a bit of sewing experience under your belt there is no reason why you can’t make something more challenging. The ‘stakes’ are higher but that’s all part of the fun!
2) Demystify
I think that the best way to approach special occasion sewing is to start by taking inspiration from everyday clothes or everyday sewing and then ‘scale up’ in terms of the type of fabric and the finishing techniques you would use. There is no reason (unless you want to of course) to make it over complicated. Case in point: Anna’s wedding skirt is a half circle skirt, one of the simplest silhouettes to fit. I would recommend to anyone making a fancy garment for someone (for a wedding or otherwise) to ask the person to bring you a favourite dress that they feel good in and get them to explain why they like it and how it makes them feel. Use that as your starting point for any sketches or initial drafting. I asked Anna to do this and we went through some of her favourite dresses – just everyday things she wears to work etc. – and I got her to talk about them. I think it was actually one of the most important parts of the process as it helped me know how Anna wanted to look and feel. This is also a chance to get an idea of the person’s knowledge of dressmaking so you can manage expectations if they have any bold unrealisitc suggestions!
3) Beware Pinterest
Pinterest can be a great tool for gathering inspiration images of course, but I find that it’s a double-edged sword. You can quickly lose sight of your own ideas – and, particularly when it comes to wedding images on the site, I feel that there is generally speaking quite a standard ‘look’ that dominates the images that come up. That’s not to say there are not tonnes of images out there online of wedding outfits that are a bit different, I just found you have to hunt for them more. Basically, keep in mind that your wedding dress doesn’t need to look like the ‘stock’ images of dresses that predominate in advertising. OK, I could have just written, ‘you do you’.
4) Get organised!
Embrace your inner planner and get a spreadsheet going! Or whatever form of organisation floats your boat! As we had to make the most of our time together I made sure everything was ready for when Anna came over – but you also have to of course be ready for everything taking double the time you had planned for it, as is the case for pretty much everything in life anyway!
5) Pretend you are a master couturière at work
How often do you get to make an outfit for a dear friend that they’ll (hopefully) treasure forever? Never! Approach the project as if you were a professional at work and your apartment is your ‘master atelier’ – even if you are battling with your own furniture for space to cut out layers of fabric!
6) Fabric choosing
I wasn’t able to go fabric shopping with Anna so I made her a list of bullet points to take with her to the shop for things to look out for and keep in mind (fabric composition, how it will hang, is it a woven or a knit etc.). Keep in mind that not everyone knows how to navigate a fabric shop – think back to when you first started sewing and bought fabric totally unsuitable for what you intended to make (and err still do sometimes). Luckily the lady in the shop was really helpful (obviously, as it’s Glasgow!) and helped Anna pick what she needed. If I was going to make this type of wedding garment again I’d do a bit more research into different fabric options I think to see what the different options are; I did find that working with the duchess satin made my hands really dry which is probably due to the coating used to finish it.
7) Keep some perspective
How many people will be thinking about the (lack of) waistband topstitching on the wedding day? One. And that’s you! And even then you’ll forget about that after about five minutes. The wedding outfits are obviously a focal point of the day but everyone will be looking at the happy couple’s smiling faces and not how well balanced the bride’s hem is. So yeah keep cool – it’s just sewing, even if it is for a wedding. At first I was worried about making Anna the ‘perfect’ skirt but that was silly. The reason she asked me to make it was because she wanted something made by a friend, if she had wanted a ‘perfect’ dress she wouldn’t have taken the DIY approach. Anna was so lovely throughout the whole thing and always (bizarrely) had no doubts in my ability to make the skirt! If the person you are making for is putting you under unnecessary pressure then you probably shouldn’t be embarking on such a project together.
8) Enjoy the time spent together
Lastly – and I think most importantly – making Anna’s skirt meant we (and Sally!) spent whole weekends together this year. I really liked this rare chunk of time together with my apartment full of laughter and layers of tulle fabric!

Congratulations to Anna and Jim! And thank you for such a lovely wedding in such a beautiful place, Uisken beach on the Isle of Mull.
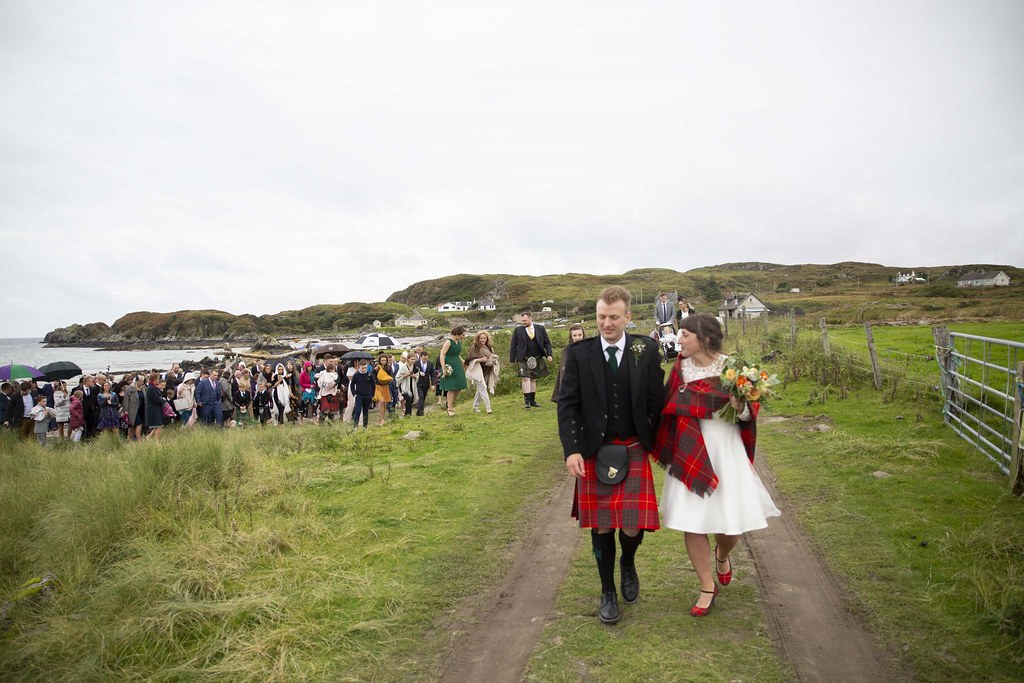 Photo credit: Ruaridh Cameron