18.9.16

Just make something

IMG_1993

This dress came together one Sunday this summer in a way which I wish happened all the time. I was pottering about thinking I'd like to make something but not really settling on any one idea. Then my eyes fell on a skirt I'd got in Les Petits Riens ages ago with the intention of altering it. Before I knew what was happening I was drafting a bodice - inspired by the original waist tie of the skirt, which became the straps - and pulling out the skirt pattern from my Colette Patterns Truffle dress to go with it.

IMG_2005

The whole thing came together really quickly and I was really focused on the task. Not only did I really enjoy the process of making it but I love the result too. For me that is the ultimate sewing feeling. Making something in a flurry of positive energy which you love and will wear.

IMG_1979

IMG_2006

IMG_2001

My first instinct is to think that it would be great if it was like that all the time. But if it wasn't for those days when I can't get focused and I make something that makes me feel less than thrilled then I wouldn't know how good those other great days feel. And, while we might not realise it at the time, it is those 'awful' days that prepare us for the good days.

IMG_1980

A friend recently told me that she was struggling to build confidence to write more, doubting why she was doing it and what she had to say etc. Then a friend said to her that it didn't matter if what she wrote was 'good' or not, or even if she read it back. What mattered was writing everyday as that way she'll be ready when her 'good' ideas come.

So I need to remember to remind myself to just make something, anything. Regardless of whether it invokes feelings of confidence and positivity or self-loathing and despair, it will make me feel alive!

IMG_1982

IMG_1994

5.6.16

In praise of the Hong Kong finish

IMG_1099

I made this jacket with the intention of wearing it with the outfit I made for my cousin's wedding, but they didn't look quite right together in the end so I didn't wear it on the day. It was an interesting project though, and I think I'll get some use out of it.

But, STOP PRESS, the best thing about making this wee jacket was that I discovered my new favourite technique: the Hong Kong finish!

The Hong Kong finish is basically a neat way to finish seams when overlocking or french seams won't cut the mustard. It involves sewing bias binding onto each side of a seam. As this jacket has a princess seam I think it gives the inside of the jacket a really cool look - in fact the inside of this jacket is way more interesting than the outside. To learn how to do the Hong Kong finish I used a tutorial in my copy of 'Sewtionary' by Tasia of Sewaholic but you can also find plenty step-by-step guides on this here world wide web.

IMG_1112
IMG_1094
IMG_1114

To make the jacket pattern I started with the Jackie pattern from La Maison Victor but I made quite a lot of changes to make it fit and I added a pleat at the back.


IMG_1101
 IMG_1119

I previously made a modified version of this pattern for the Sew It Up competition back in 2014. This time round I changed the shaping at the front. Unfortunately I think I should have used some stronger interfacing as the fabric requires a bit more support to sit right. I feel it droops slightly.

IMG_1097

To jazz up proceedings I also used some red piping in the shoulder seams.

IMG_1088

Not a life-changing project by any means but always good to learn new techniques and do a bit of pattern engineering to modify patterns! I particularly enjoyed working out how to do the facing which I mostly sewed by hand.

I'll definitely be using the Hong Kong finish more in the future to make the insides of garments as nice as their outsides - and maybe even better.

IMG_1115

20.5.16

A Tate and Belladone wedding outfit

IMG_1034

I made this outfit for my cousin Holly's wedding which took place a few weeks ago in Bonnie Scotland. I'm not very good at knowing what to wear for special occasions so I knew I wanted to make something specifically for the wedding that I really liked. I set myself the challenge of sewing something from fabric I already have rather than buying more. This was also a way of helping me decide what to sew - i.e. I started by choosing the fabric and then deciding what kind of style I wanted to sew, rather than the other way round.

IMG_1042

IMG_1033

I bought this fabric a few years ago in a shop in the Montmartre in Paris. I absolutely love it and I'm so glad I finally made something with it! It's quite sturdy and I think it is perfect for making something look a bit more formal.

After much deliberation I decided to make a two-piece outfit and make the skirt from the Deer & Doe Belladone dress and the Tate Top from Workroom Social.

For the skirt I lined the waistband with some soft denim and added a lining. I'm really pleased with the overall finish and think it might be one if my best ever invisible zips! :) One of the things I love about the Belladone pattern is the slip stitching required for the hem facing. I think a hem facing is such a good way to finish any garment.

IMG_1083

IMG_1079

IMG_1078

IMG_1077

For the Tap top I made quite a lot of changes: I adjusted the length to make sure it stopped just before the skirt. I moved the front neckline darts to the underarm position - and I moved the back darts so that they are in line with the front darts. I decided to use this wonderful video tutorial from Sew Over It and do an all-in-one facing as I think this gives the cleanest finish. I used a hem facing for the outer fabric and I finished the all-in-one facing with some red bias binding.

It wasn't my intention when I started but the top is actually fully reversible and can be worn both ways! Result!

IMG_1047


IMG_1048


IMG_1069


IMG_1057


IMG_1058

Overall I'm really happy as I made two garments I enjoyed wearing for a special occasion but they will also get lots of use in everyday life worn separately!

Thanks to my patient Mum for taking these snaps! :)

IMG_1025

28.3.16

A next time

IMG_0676

IMG_0663

I've recently gone back through my previous sewing projects and read what I said about them at the time. I've often said things like 'if/when I make this again I will...' or 'next time I'll change...'. Inevitably many of these 'next times' have not happened yet. So I thought it would be a good idea to look at past musings on some of my previous sewing projects and then decide whether the 'next times' were still on the cards or not.

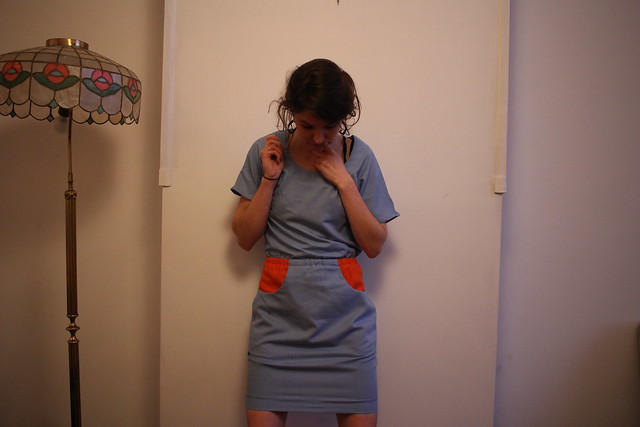
One pattern I was definately still motivated to have a second stab at was Papercut Patterns' Clover dress. I made it back in November 2014 and I had trouble getting it to fit because I didn't choose the correct pattern size. I really enjoyed this project because it helped me have a big revelation about pattern sizing and the importance of the high bust measurement!

In a nutshell I realised that I should choose patterns based on my high bust measurement. First you should find out the difference between your pattern's high bust measurement and full bust measurement (if in doubt go for 5cm as this seems to be the standard for patterns drafted for a B cup). Then you take your own high bust measurement and add this difference to it. Then choose the pattern size with the bust size which corresponds closest to this measurement. You will then need to take out the difference between your actual full bust measurement and the pattern bust measurement as the pattern will fit at the shoulders and back but it will still be too big at the bust. So you will need to do a small bust adjustment. (See my previous post for a fuller explanation!)

So, last time I made the mistake of just choosing the size XXS (bust 82cm) - my bust measurement is 78cm so I thought it would make sense to choose the smallest size and then just do an SBA to take out the excess at the bust. But what I didn't realise was that when you substract 5cm from 82cm you get a high bust measurement of 77cm which means this size is actually too small for me at the back and under the arms (my high bust measurement is 79cm).

IMG_0663

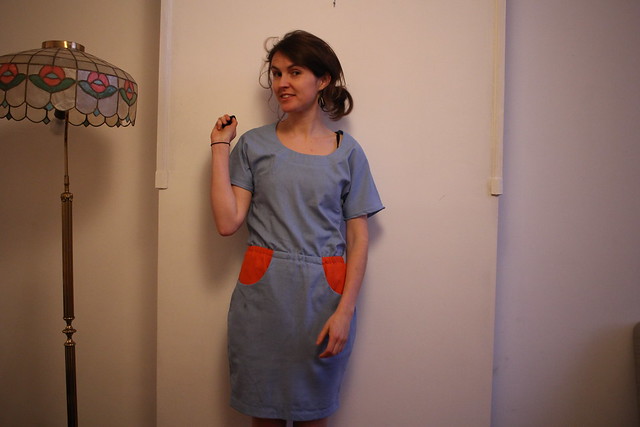
This time I took my high bust measurement and added 5cm to it (79 + 5 = 84cm). So based on this measurement I chose the next size up, XS (bust 88cm). Then I did an SBA to take out the difference between my bust measurement (78cm) and the pattern size (88cm). The main problem for a pattern like the Clover is that it's not very obvious how to do an SBA! So I just decided to invent a method which involved taking in the centre front seam. I taped all the pattern pieces together and sort of held it up to myself to see what seemed about right and then redrew the centre front down all pieces at the same time. I'm sure that is not a 'proper' method but it worked for me!

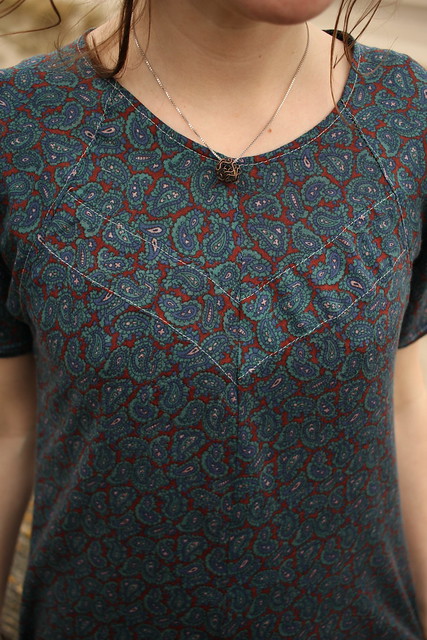
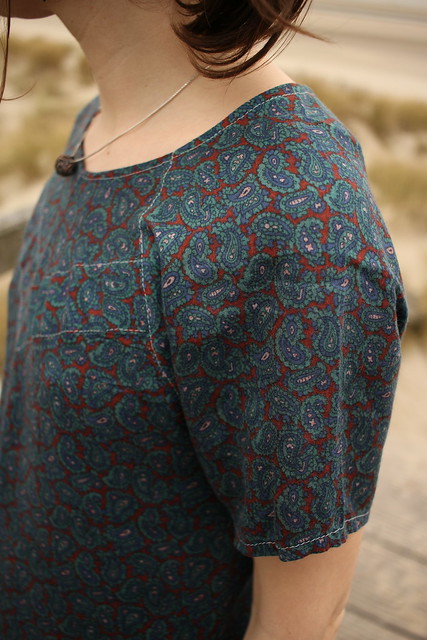
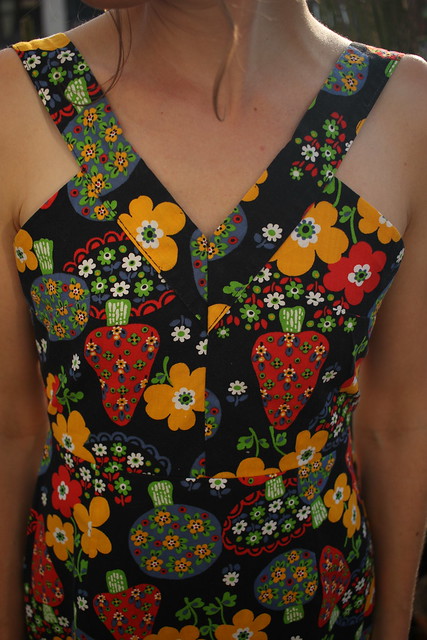
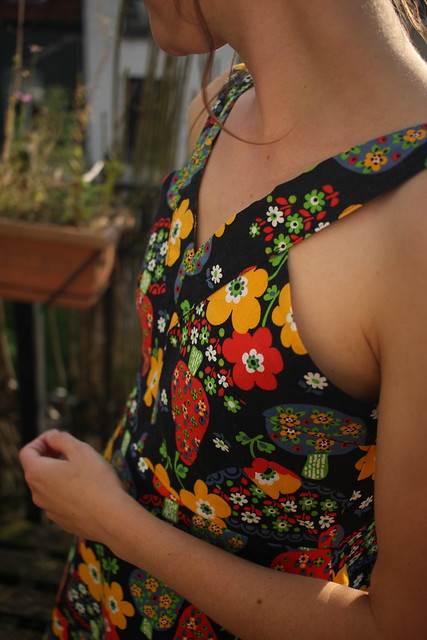
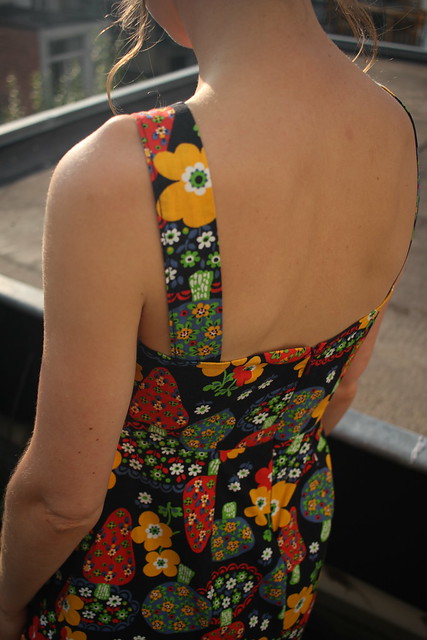
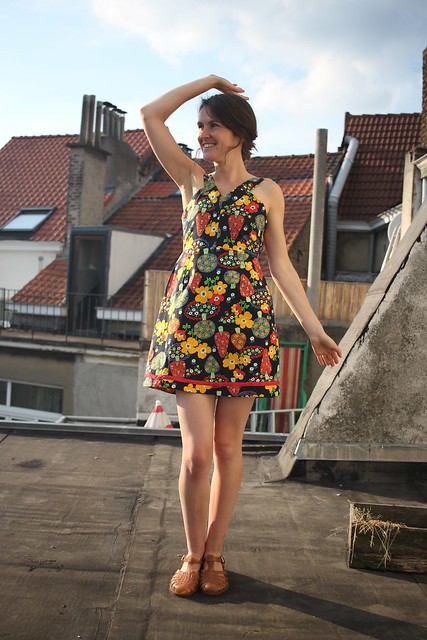
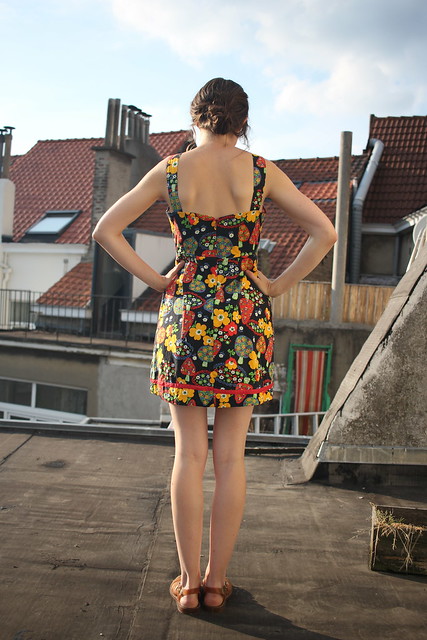
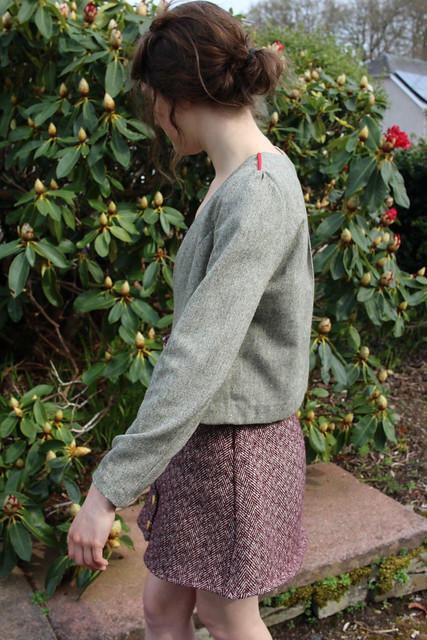
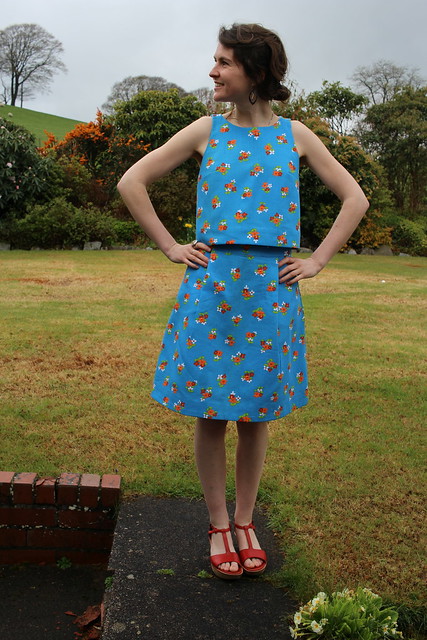
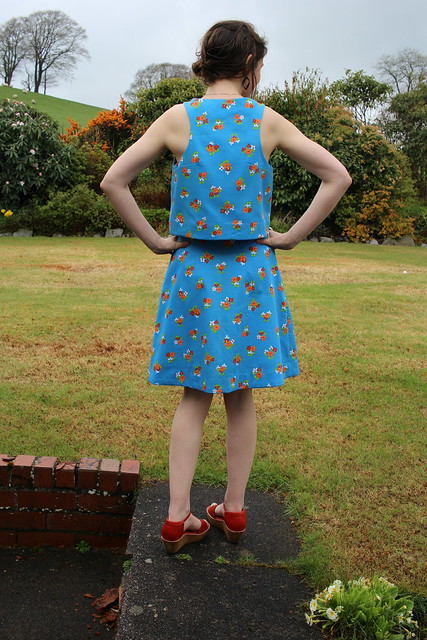
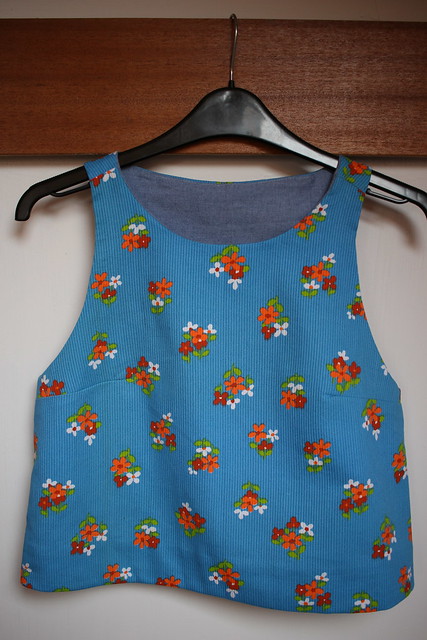
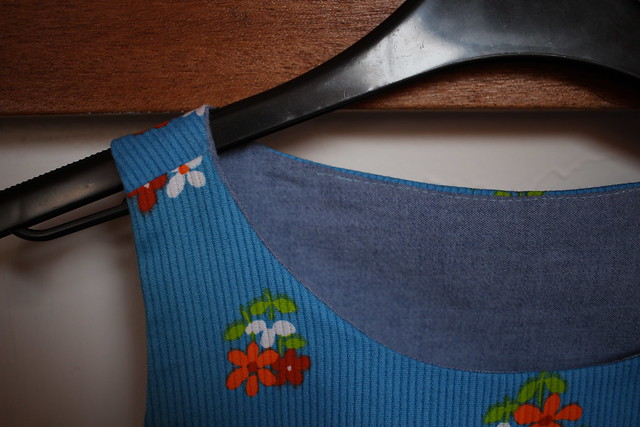
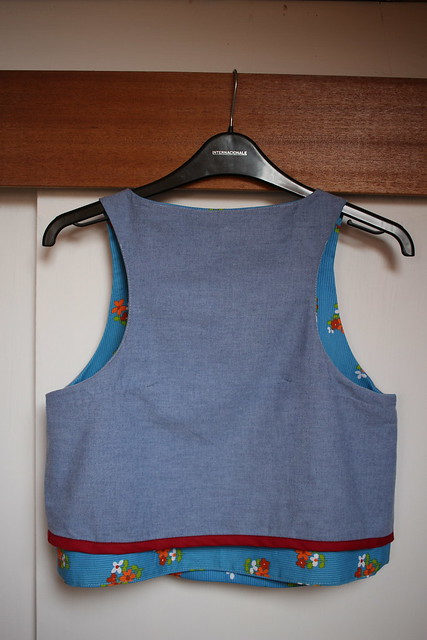
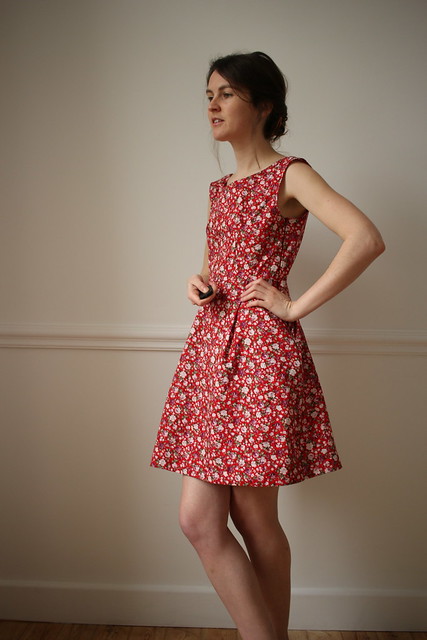
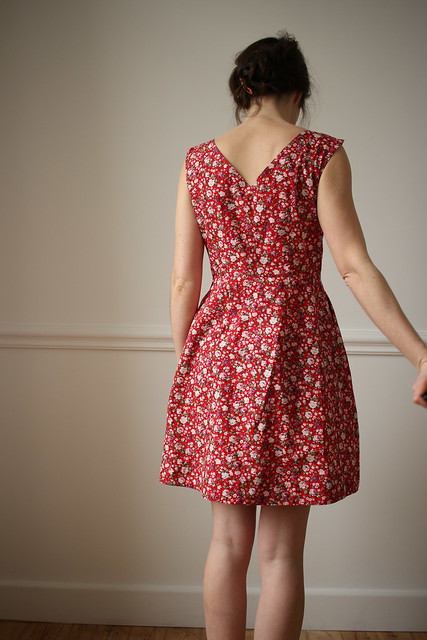
In the end I took out slightly less than 5cm at each side as it seemed like a lot when I held up the pattern pieces to my body. I'm really happy as it sits perfectly at the neckline and doesn't sag at all. At the back it is not tight at all and it is much more comfortable under the arms than my previous attempt - if I was being really picky I should probably take out a bit at the back neckline but I think it looks fine and as it is a loose style you don't notice.

IMG_0669

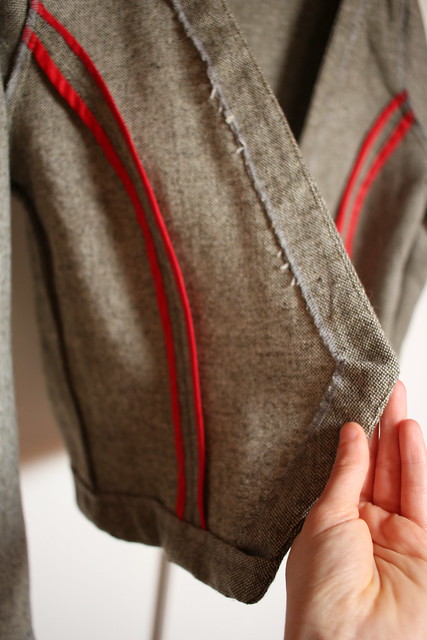
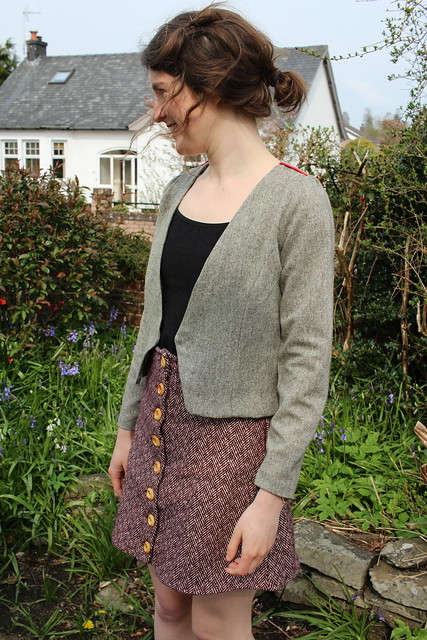
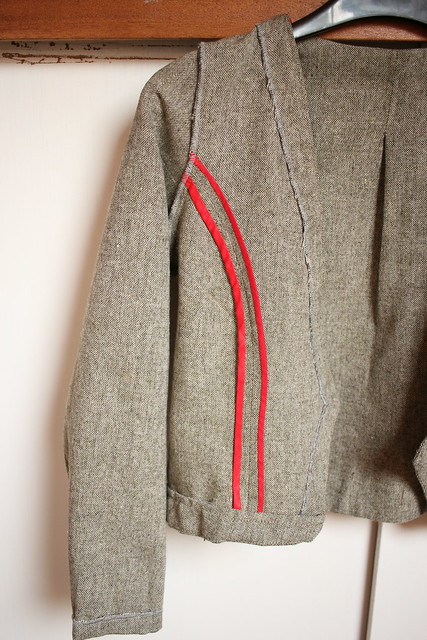
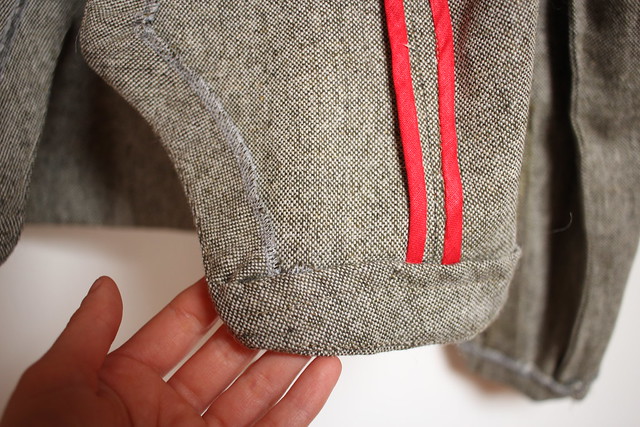
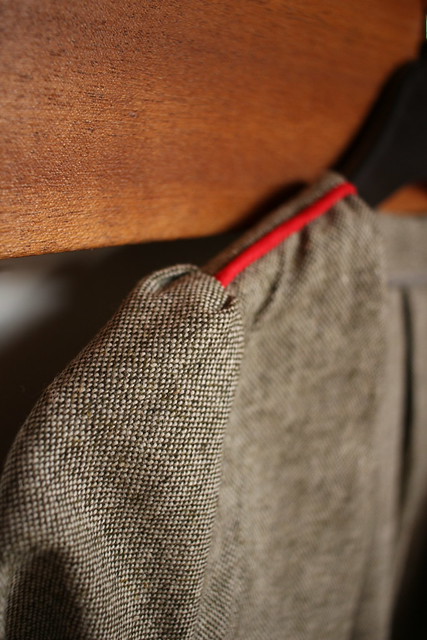
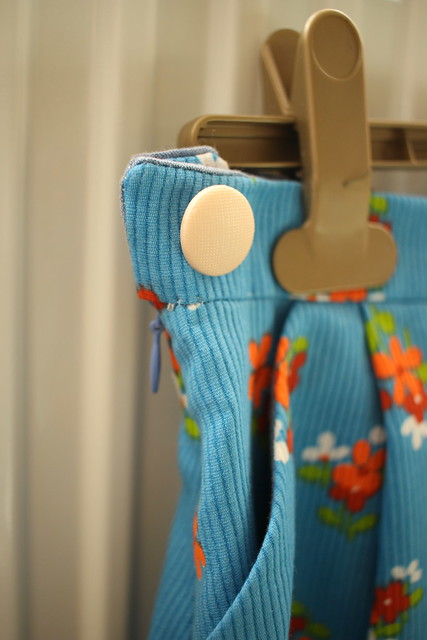
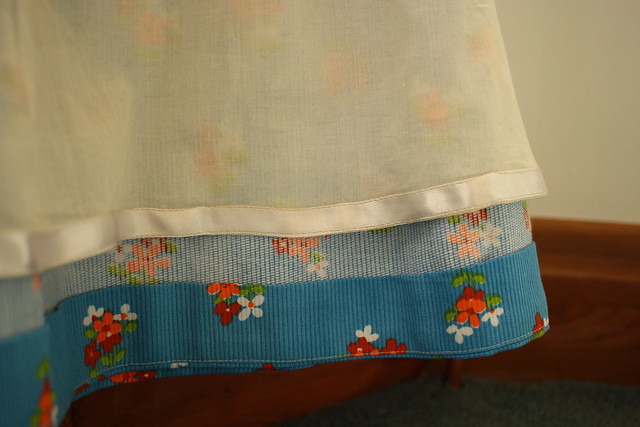
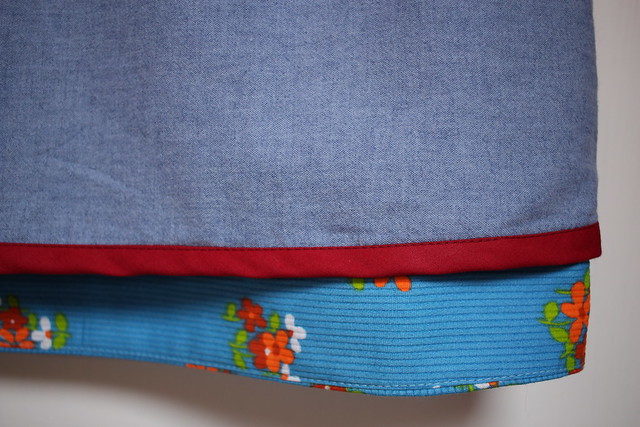
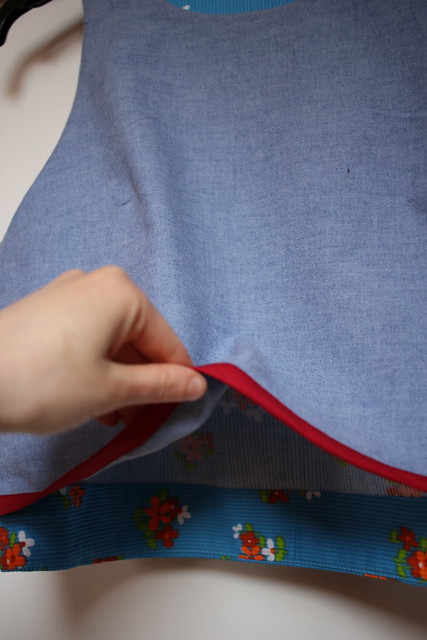
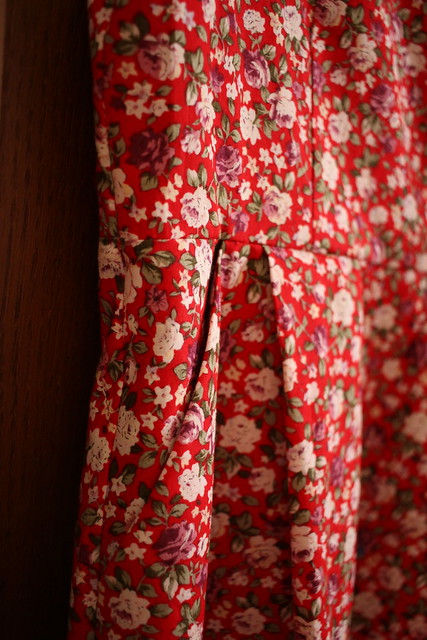
I decided just to do the bust insert pieces in the same fabric but do some grey topstitching to accentuate them.

IMG_0680

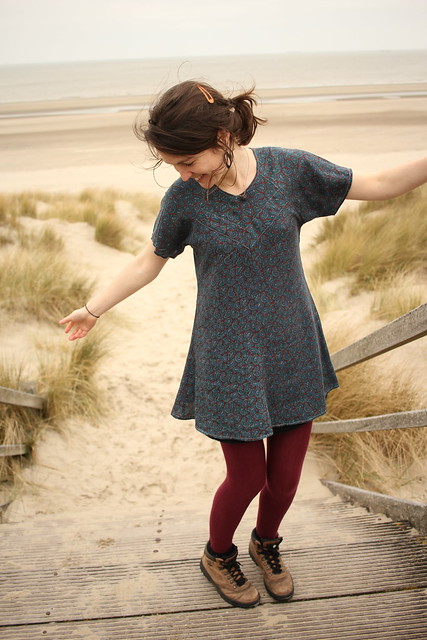
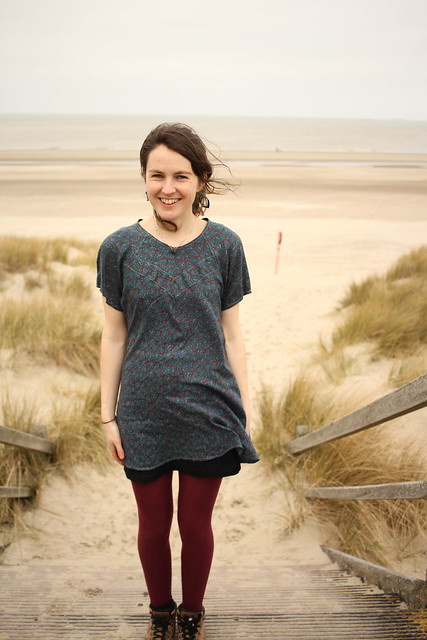
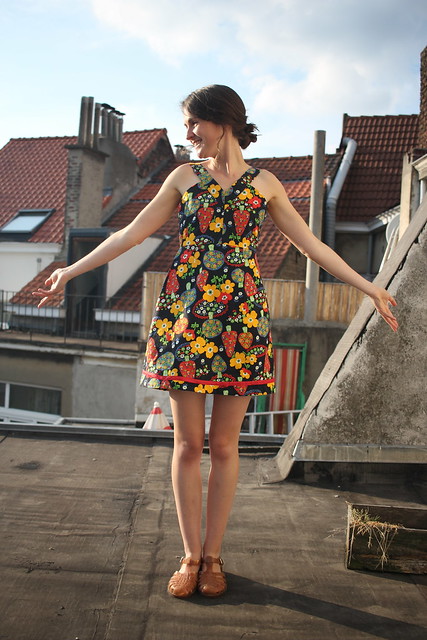
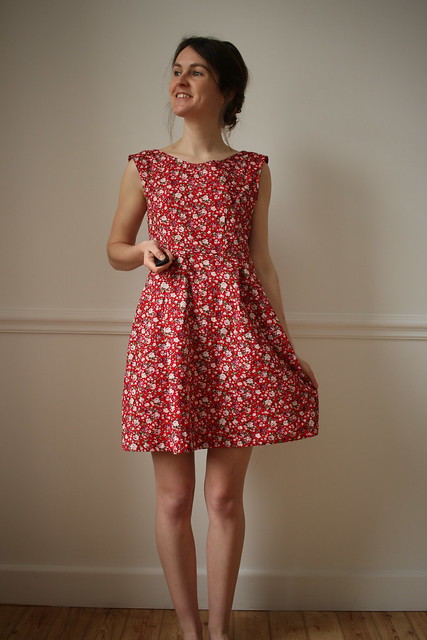
All in all I'm really happy with the finished result!

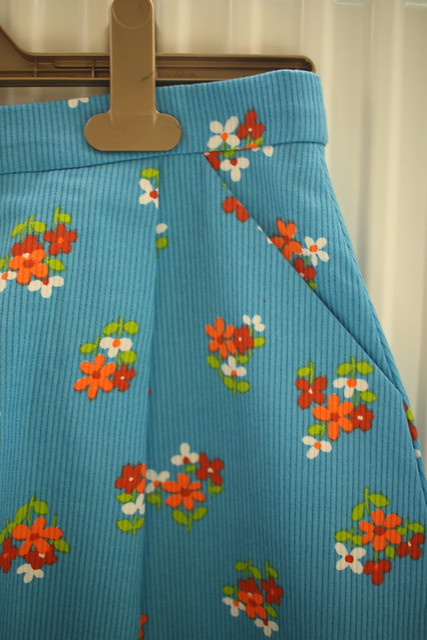
The fabric comes from a shop I recently discovered and it was ridiculously cheap, 2 euros a metre. The shop is just beside the canal in Anderlecht and is called 'GoTex'. Really friendly and nice staff too! Highly recommend a visit there.

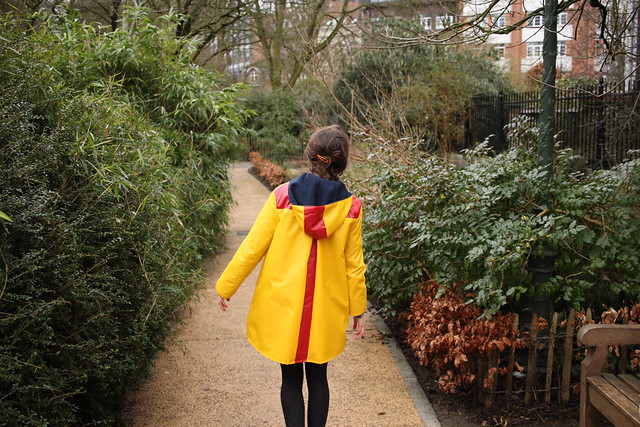
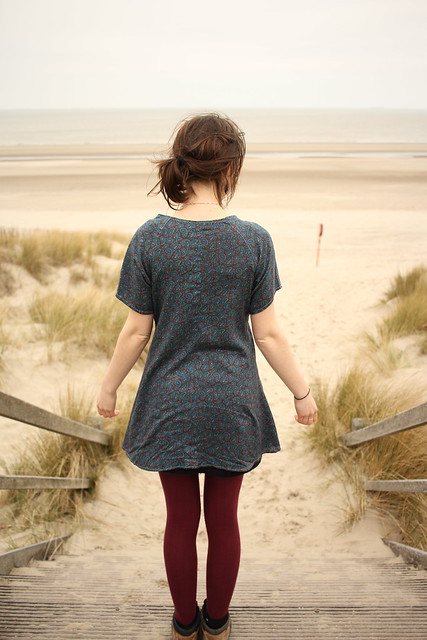
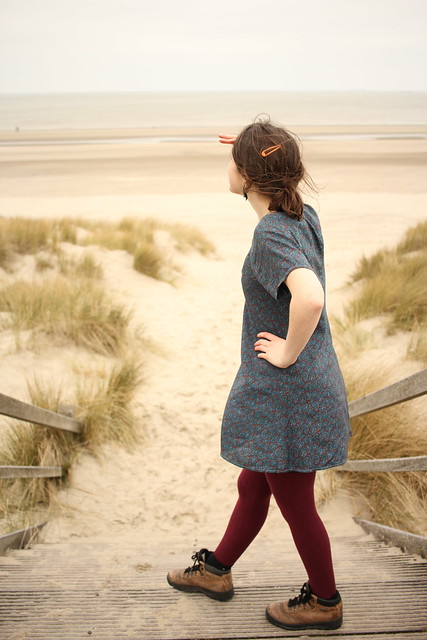
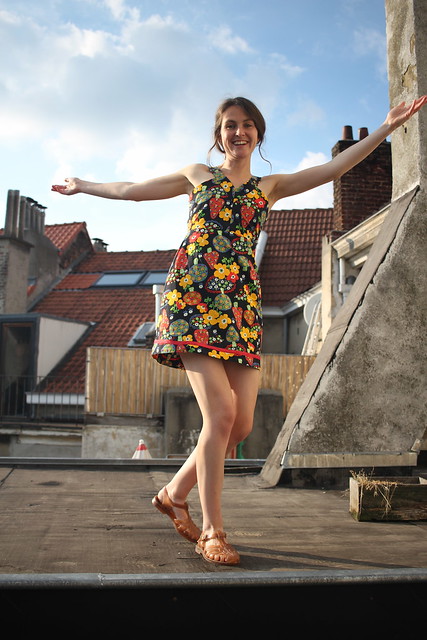
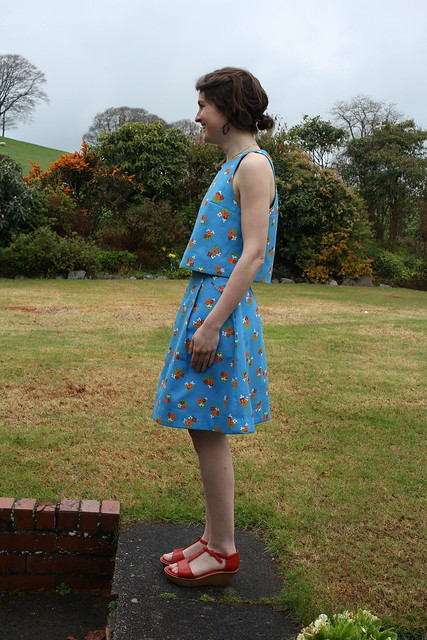
I made the dress a few weeks ago and have been wearing it loads so far. I cut the hem quite short so it is more of a tunic than a dress - but I've worn it with chunky tights a lot. In these photos I'm wearing it with another skirt underneath for warmth. I took the opportunity to get some quick pictures while visiting Blankenberge on the Belgian coast this weekend. It was pretty cold and windy so when I say 'quick picture' I'm not lying. I was keen to get my jumper and coat back on!

IMG_0652

I'd previously visited Ostende and Knokke but this was my first visit here and it didn't disappoint. I like the slightly kitsch faded-glamour of Belgian seaside resorts. They always remind me of childhood trips to Blackpool in the UK. We ate ice cream and waffles in a place called Chez Vincent with amazing 80s' decor, played air hockey in an arcade, walked in the sand dunes, walked along the shore, drank hot chocolate in the café on the 'Belgium Pier', and ate our packed lunch in a very windy spot with a generous serving of sand.

From Brussels (via Blankenberge) with love x x x

IMG_0667

4.3.16

Un air de printemps

IMG_0581 IMG_0578

Yup. It's the beginning of March and spring is just round the corner - so I've got a flowery dress on. Florals for spring? Grounbreaking! I have a funny relationship with florals - I'm like a magpie when it comes to floral fabric and I want to eat it all up, so I make plenty of flowery clothes. But sometimes I feel like I'm drowning in a sea of petals when I open my wardrobe.
IMG_0565
IMG_0461  
This is my fourth make as part of the White Tree Fabrics blog team and the fabric is a lovely red cotton, perfect for a summery dress. It's not too stiff so it drapes quite well. The dress is another Belladone - this time I redrafted it in a size up based on my high bust measurement and then did an SBA - this means it fits better round the back and shoulders and the looser fit at the waist is quite nice - an extra centimetre leaves plenty of space for lunch.

For this fabric I had initially wanted to make a Tilly and the Buttons Bettine dress but when I made up a test version I really really didn't like the style for me - I found it unflattering and really not very practical for my daily life - how I am I supposed to cycle like this?! 
IMG_9889 IMG_9884
So another Belladone was born!
 IMG_0586

20.2.16

Who'll stop the rain?

IMG_0437

I had barely finished the final stitches of my blue plaid coat and for some strange reason I decided to plunge straight into another coat making project.

It’s interesting how we pick projects – why do we have ideas for some things and then take months to get round to taking any action, and others just spring from nowhere and the wheels are in motion before you can stop to think about it?

This particular project was the result of a few factors:

1) The fact I don’t really have a proper waterproof jacket (a bit strange considering I’m from Scotland and live in Belgium, and love cycling and being outside..). Every year I feel as if I muddle through and by the time I think of getting one it’s nearly spring. Maybe I’m not as outside as I’d like to be!
So I had thought about trying to make one but didn’t really seriously entertain the idea. I just bought some very cheap yellow and red waterproof material on a whim in Berger a few months ago with the vague idea of making one at some point.

2) I’ve been seeing wonderful yellow jackets everywhere for a while now. It seems the yellow raincoat is very à la mode en ce moment.

3) Then I found out about Make My Lemonade – partly through my flatmate (who also sews, yay!). And through Jo’s post about her great Paloma shorts. Looking around on the site I found the Rita pattern which set the lightbulb off in my mind and the project was born.

So before I knew what was happening I was in the midst of making a raincoat!

IMG_0444

IMG_0438

Rita is a great basic (and free!) pattern but I made some significant modifications to it: I lengthened the sleeves, added a fleecy lining, and added a three-piece hood. I really love the back pleat and yoke and wanted to accentuate them by using a contrast colour.

IMG_0445"

IMG_0070"

IMG_0072

I really enjoyed working out how to sew in the lining! I can’t really explain the process properly but there are lots of great tutorials out there on bagging linings. But what I wish I had done though is cut a bigger size to take into account the extra bulk of the fleecy lining. It’s a bit tight under the arms so I can’t really wear a big jumper with it. It’s fine with a thin jumper or cardigan though. If I make this pattern again I'll also lengthen the sleeves a tad.

IMG_0447

The only part which was a headache was adding snap buttons! Argh!! For the life of me I couldn’t work out how to put them on. I tried so many times but they just wouldn’t stay on the material. In the end after much deliberation (and hammering) I took the nearly-finished coat to a couturière to see if she could add the snaps on - and she did! I thought it would be better to actually pay a bit more and get the project finished properly rather than ruining it by messing up the snaps. I’d like to master snaps though myself as I’m not a massive fan of sewing buttonholes!

IMG_0326
(before the snaps were added!)

IMG_0074

I think it is great for pottering about when it is a bit rainy but not that baltic. So far I’ve worn it in light rain mostly, and once in quite heavy rain on my bike – I was surprised that it kept my quite dry, although as it is not the best quality waterproof material I wouldn’t set off on a hike with it or anything. But if it can handle my 10 minute cycle to work that’s good enough for me. If I can get my hands on some good quality waterproof fabric I'll definitely think about making another raincoat. It’s no North Face-type jacket but I really love it and I think this is one of those moments when you have to stop yourself from being overly critical and remind yourself that you made a raincoat. Yes!

IMG_0433